Thursday, 21 February 2013

culinary experiment: tuna mayo kimbap

This is my very first attempt at making kimbap or Korean style seaweed rice rolls.


The first time I tasted kimbap was along Meokja Golmok (literally translated as let's eat alley), a busy food alley cramped with street food vendors in Nampo-dong, Busan.


We were there to try the famous street food, bibim dangmyeon (glass noodles mixed with vegetables and red pepper sauce). It was included in our 'die die must try' food list after having seen it on 'Tasty Road', a Korean food and travel program. It was quite an experience having to cramp in front of the tiny 'table', with our knees and elbows brushing against each other as we tucked into the delicious bowls of noodles, right in the middle of the alley, out in the cold. It took a while for me to get used to sitting on the low plastic stools as our knees came up to as high as the table (see above picture on left), with our bags and camera on our lap as we ate...there was no space to put our belongings...and not forgetting our cumbersome winter jackets! I really salute the locals, they appeared so at ease and comfortable enjoying their snack food!


Besides the dangmeyeon, we also ordered some chungmu kimbap, mini rice seaweed rolls served with odengs (fishcake) to try. Never mind the food presentation, these mini kimbap and the damgmeyoeon tasted exceptional delicious! I am not able to describe the taste, you have to go try it yourself ;)


It has been more than two months since we came back from our South Korea trip. I thought I have almost recovered from Korean food withdrawal syndrome as the Chinese lunar new year feasting binge took over. But when I saw this easy and simple tuna rice rolls recipe from a cookbook which I borrowed from the library, I started craving for Korean food all over again! This book, 'Good Morning! 每天都要吃早餐: 10分鐘就能上桌的小確幸早餐提案', is actually a collection of breakfast recipes written by a Korean author. I doubt I will ever be able to get these rolls on my breakfast table in 10 mins (as suggested by the title of this cookbook), I made these tuna rolls for a light lunch instead.


Making these tuna mayo seaweed rolls was actually not that difficult for me since I have experience making sushi rolls or maki. Prior to making these mini kimbap, I have always thought kimbap and sushi rolls are the same, at least they look the same to me. It was only after some googling around, I learned that there is actually a difference between the two. The sushi rice is prepared with rice vinegar, sugar and salt; while the kimbap is made with rice that is usually seasoned with sesame oil and salt. I find it much easier to make kimbap as the rice is not as sticky as sushi rice, making it less messy (for me!) to spread it onto to the seaweed. I didn't use dried seaweed sheets meant for rice rolls, I experimented with salted, toasted crispy Korean seaweed sheets instead(that was what I have in my pantry cupboard). Luckily, I was able to roll up the rice rolls neatly, the seaweed didn't tear or give way, lol!


I made these specially for my younger child who loves canned tuna and sushi. I wouldn't say these mini kimbap are to die for since there is only one main ingredient. Both of us prefer the sesame oil flavour rice even though it didn't taste as soft as sushi rice. No matter how simple it is, nothing beats home cooked meals, I really enjoyed our once a week,  just the two of us, weekday lunch together. Hmmm...will have to start thinking what to prepare for our next lunch date ;)


Simple Tuna Mayo Kimbap

Ingredient:
(serves 2)

2 cups uncooked Short grain rice (cup here refers to the standard measuring cup provided by rice cooker)
2 teaspoons sesame oil (adjust according to taste)
1/2 teaspoon salt (adjust according to taste)

1 can tuna chunks
1 tablespoon mayonnaise (I use Japanese mayonnaise, Kewpie brand)
some freshly cracked black pepper
some dried parsley flakes (optional)

4 sheets roasted seaweed


Method:

Cook 2 cups rice with 2 cups water in rice cooker. When the rice is cooked, leave in rice cooker for 15mins. Remove cooked rice from rice cooker. While the rice is still hot, add sesame oil and salt, mix with rice paddle, add more sesame oil or salt if desired. Leave aside to cool (about 5 to 10mins) while preparing the tuna filling.

Drain the water/oil from the canned tuna. Mix in mayonnaise, black pepper and dried parsley flakes (if using). Set aside.

Place a sheet of roasted seaweed with the shiny side down on a sushi bamboo mat. Divide rice into 4 portions. Spread 1 portion of the rice (should still be a little warm, not completely cold or hot) evenly onto the seaweed, leaving about 1/2 inch of open strip on bottom and about 2 inches on top (the rice should cover about 2/3 of the seaweed). Place tuna mixture,  length wise, on the rice, roll up from the bottom. Repeat with the remaining rice.

Wet a sharp knife with water or rub with some sesame oil. Cut each roll into 6 pieces (wet the knife after each cut to prevent sticking). Arrange cut rolls on plate, if the rolls are not served immediately, cover with cling wrap.




Thursday, 14 February 2013

Orange Chiffon Cake in cups

Happy Lunar New Year to everyone!

Pardon my tardiness in updating my blog and thousand apologies especially to those who still hop over to this tiny blogosphere once in a while.

I do bake regularly but I am always going back to my favourite recipes such as pandan chiffon, the usual bread loaves and buns, simple muffins and cookies. Nothing inspiring or worth mentioning...


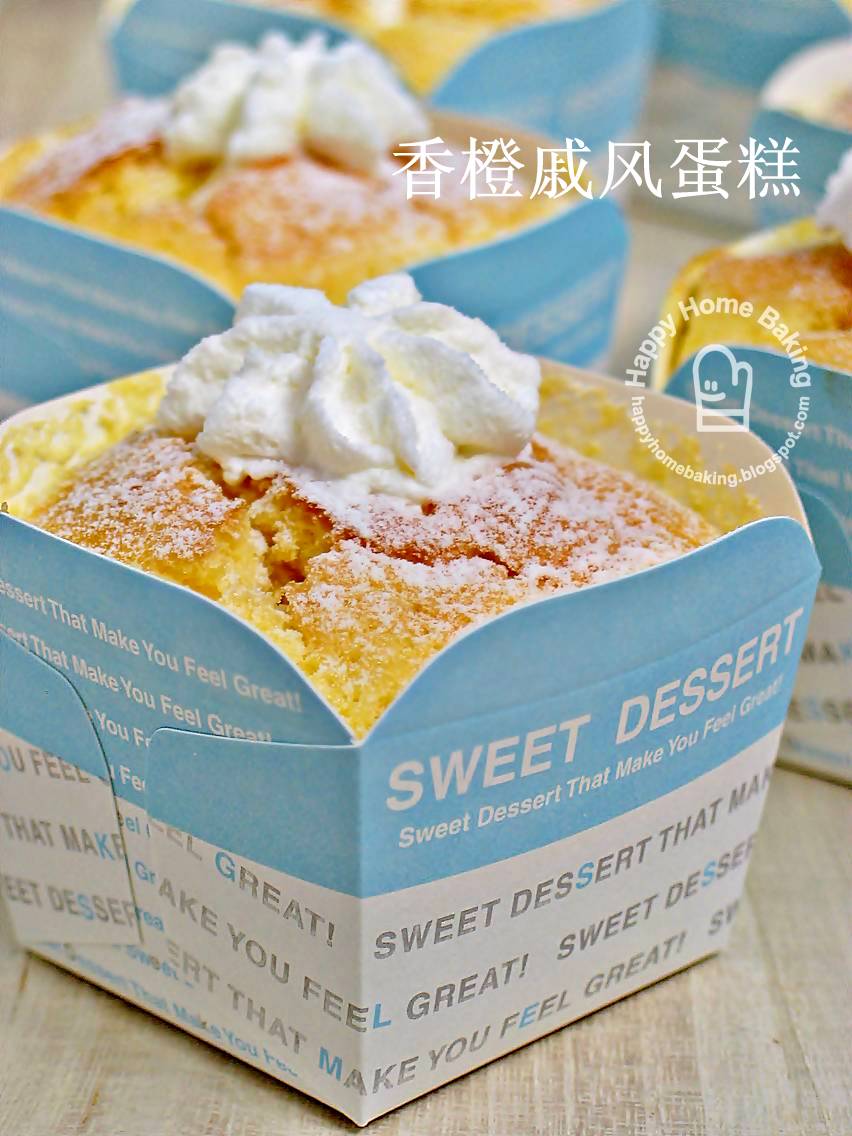
except for this latest Orange Chiffon cake which I baked in paper cups instead of the usual tube pan. I have meant to give the cake away, and what better way to present the cake using these lovely muffin cups :)


I piped whipping cream into each cup cakes. just so to start using the carton of non-dairy whipping cream I bought a month ago. The end result looks quite similar to the popular Hokkaido chiffon cake though.


The chiffon cake texture was soft and light although they were baked in paper cups. While baking in the oven, they rose beautifully over the rim, almost on the verge of overflowing. Most of them cracked...but I have no issues with cracked chiffon cakes, in fact I love the cracks ;)

Once out of the oven, they started to shrink, I didn't invert the cakes (or should I??) and left them to cool right side up. Very soon, the cakes deflated to just the right height...not falling short of the base of the four flaps on each square cup. It was my first attempt at piping cream into a cup cake. I have no idea how to go about it but to rely on my gut feel. I simply forced the piping tip into the centre of the cake and squeeze in as much cream I could, I stopped piping when the cream started flowing out from the side of the piping tip. I used the remaining cream to pipe rosettes on the tops, so as to cover the holes. I kept my fingers crossed that I was doing the right thing...that I got enough whipping cream into the cake. Fortunately, these little cuppies were meant for family, I have no qualms about giving away half-filled cakes to family members, actually I didn't even taste one before I gave them away, something I wouldn't do if they were meant for friends ;) 


It turn out that I got the piping right as the cuppies were filled with quite a substantial amount of cream, although I think the cakes could take in more. The taste, at least the whipping cream, was rather close to those store bought Hokkaido cake which I have tried. I received positive comments such as...'they taste better than store bought ones'. Credit must go to the orange chiffon cake recipe which I have taken from my favourite chiffon cake book, 好吃戚风蛋糕轻松上手. The cake was delicious and full of flavors as they were made with orange juice, orange zest and Cointreau (an orange-flavoured liqueur)...another baking ingredients which I have just used even though I bought it more than a year ago. 

With this little experience I have gained, I expect myself to bake some real Hokkiado chiffon cupcakes soon...


Orange Chiffon Cake in cups

Ingredients:
(makes about 15 cupcakes)

5 egg yolks
40g caster sugar
55ml vegetable oil
95ml orange juice (from about two oranges)
2 teaspoons Cointreau
zest from 1 orange
130g cake flour

7 egg whites
70g caster sugar

for frosting:
about 240ml (1 cup) non-dairy whipping cream for piping
1 teaspoon Cointreau
some icing sugar for dusting

Method:
  1. Place egg yolks in a mixing bowl. With a manual hand whisk, whisk the yolks a little. Add in sugar and whisk to combine. Add in vegetable oil gradually, whisk to combine. Add orange juice, cointreau and orange zest, whisk to combine. Sieve over the flour and whisk till the flour is fully incorporated. Do not over mix. Set aside.
  2. In a clean, dry mixing bowl, beat egg whites with a handheld electric mixer on low speed until mixture becomes frothy and foamy. Add half of the sugar amount and turn to high speed and beat the mixture. Continue to add in the remaining sugar and beat until the egg whites reaches the soft peak stage.The soft peak stage is reached when the peaks of the whites curl over and droop slightly. The egg whites should appear smooth and glossy. (Do not over beat the whites still stiff, it is better to beat the whites still soft peaks for easy folding with the yolk batter.)
  3. Add the beaten egg whites into the egg yolk batter in 3 separate additions, each time folding gently with a spatula until just blended.
  4. Pour batter into paper cups till it reaches just before the base of the flaps. Place paper cups onto baking tray and bake in pre-heated oven at 180 degC for 12~15 mins, or until a toothpick inserted into the centre comes out clean. Leave to cool completely.
  5. With an electric mixer, beat non dairy whipping cream and cointreau until stiff. Fit piping bag with a piping tip, fill the bag with the whipped cream and pipe the cream into the centre of the cake. Dust with icing sugar and leave to chill in the fridge before serving. 
Recipe source: adapted from 好吃戚风蛋糕轻松上手, 福田淳子

Monday, 31 December 2012

a birthday and an anniversary

It is the time of the year again...

as the new year approaches, in just a few hours...

I gladly bid farewell to year 2012...

a year filled with wonderful memories and precious moments for me to treasure in years to come...

to mark the end of yet another year of baking and blogging, I will like to share with you this banana chocolate sponge cake.


I first saw this monkey cake a year ago when I was looking for a suitable birthday cake recipe for my son. However, back then, we were away from home, and even though the service apartment came fully equipped with an oven and basic baking tools, I wasn't gung ho enough to give this a try. I am glad that I went ahead to make it ten days ago, and it turn out to be the cake of the year (for me)!


Instead of the usual sponge cake, I baked a banana sponge cake for the layers. Recently, I have a reader who encountered some problem with this banana sponge cake recipe. I really admire her never give up attitude. Although I wish I could show her how I made this cake, but, I am no professional baker and I am certainly not qualified to give any advice especially since I have not even attended any baking class. The least I could do was to bake this banana sponge cake again so that I could at least revisit the steps to ensure I didn't mislead anyone with my instructions. The cake turned out well, with a nice golden browned crust, and soft and moist texture. I am quite certain that this reader has prepared the batter correctly, the only thing I could pinpoint would be the oven temperature, could the oven be too hot?? I understand how disappointing it is whenever I have to face a failed attempt. I sincerely hope she could get it right the next time, all the best!


My child was grinning from ear to ear when I presented the cake to him. Even though he was not born in the year of the monkey, he behaves pretty much like one ;)

The banana cake was so delicious with the chocolate ganache, the only downside was, the coco pops turned soft by the time I served it, and, it was really, too cute to eat, luckily it was quite an easy cake to put together.


Happy birthday to both my little munchkin and this humble blog of mine! It seems almost like yesterday when I went home with my baby boy on a Christmas day....and, it doesn't seems too long ago when I was pondering for a name for my blog. In reality it has already been six years since I published my very first post! I really hope I could still keep it going for another year or two...

or maybe three, or four years to come....

Here's wishing all of you a joyful new year!

And may your kitchen be filled with sweet memories and wonderful aroma of freshly home baked goodies, 
all year round!  


Banana Chocolate Monkey Cake

Ingredients:
(make one 7" round cake)

for sponge layer:
3 large eggs, room temperature
100g caster sugar (original recipe uses 150g)
3 large ripened bananas, cut into chunks
150g cake flour
1/2 teaspoon baking powder
1/4 teaspoon baking soda
80ml vegetable oil
20ml milk (I used low fat fresh milk)
1 teaspoon vanilla extract

for chocolate ganache:
170g pouring cream (I used one can Nestle pouring cream)
170g semi sweet chocolate chips (or use any dark baking chocolate, coarsely chopped)

for peanut buttercream:
50g unsalted butter, room temperature
30g icing sugar
1 and 1/2 teaspoons milk (I used low fat fresh milk)
about 1 tablespoon peanut butter jam (use more if necessary)

for decoration:
chocolate flavoured rice cereals (I used one mini pack 30g kellogs coco pops)
2 regular size chocolate chips
1 large cookie


Method:

to make sponge cake:
  1. Grease (with butter) and flour sides of a 7" deep round pan (Note: original recipe calls for an 8" pan), line the base with parchment paper.
  2. Sieve together cake flour, baking powder and baking soda. Sieve the flour mixture twice and set it aside.
  3. Place vegetable oil, milk and vanilla extract in a mixing bowl, set aside.
  4. Place eggs, caster sugar and bananas in a large mixing bowl. With an electric whisk, whisk the mixture at Low speed for a few seconds (to break up the bananas). Change to medium-high speed, and whisk the mixture till it becomes thick, pale and triple in volume. This should take around 7 to 8 mins. The batter should leave a ribbon like trail when the paddle is lifted. Test by lifting up the whisk/paddle, and draw an '8' with the batter. The number should stay for a few seconds. Turn to Low speed again, and beat for another 2 mins. This is to stablise the air bubbles in the batter. (Note: do not over beat the batter...it is not a good thing if the '8' doesn't disappear.)
  5. Sieve over the flour mixture in 3 separate additions. Each time Fold In the flour carefully with a Spatula, making sure there is no pockets of flour being trapped at the bottom of the bowl. Do not stir the batter with the spatula, it will cause the batter to deflate too much.
  6. Pour a small portion (less than 1/3) of the batter into the mixing bowl in Step 3. Fold in with the spatula until the oil mixture is fully incorporated into the batter.
  7. Pour the mixture in Step 6 back into the rest of the batter (Step 5).
  8. Fold in the batter with the spatula making sure the mixture is well combined. (By now the batter could be deflated by about 20% or so as compared to Step 4).
  9. Pour the batter into the prepared pan, the pan should be about 75% to 80% full (Note: original recipe uses an 8" round pan, I baked extra batter in two muffin paper cups) .
  10. Bake in preheated oven at 160 degC for 40-45mins or longer until the surface turns golden brown and a toothpick inserted into the centre comes out clean. (The edges of the cake should pull away slightly from the sides of the pan.) Remove from oven, unmold (slide a thin bladed knife along the sides of the pan) and leave to cool (inverted) on a cooling rack.

to make chocolate ganache:
  • Place cream and chocolate chips (or chopped chocolates) in a bowl. Set it over a saucepan of simmering water (make sure the bowl is big enough to sit over the saucepan).
  • Stir the mixture gently with a spoon till the chocolate melts and mixture becomes smooth. Remove from the bowl from the saucepan. Use immediately.
to make peanut buttercream:
  • Beat unsalted butter with an electric whisk in a mixing bowl until smooth and creamy. Add icing sugar, continue to beat until the mixture turns pale and fluffy. Add milk beat till smooth. Add peanut butter (gradually so as to adjust to the desired colour tone, use more peanut butter if necessary) and beat till smooth.

to assemble:
  • Make a simple piping bag with parchment paper (refer here for instructions). Fill the piping bag with about 1 tablespoon of chocolate ganache, set aside.
  • Slice the banana sponge cake horizontally into three layers. Place a layer of sponge cake on a cake board. 
  • Spoon about 4 heaped tablespoons of the chocolate ganache onto the surface. Spread evenly with a spatula. Repeat with the second layer of sponge cake. Place the third layer and spoon the remaining ganache over the top and spread it over to the sides. Smooth the surface with the spatula. 
  • On the cake surface, draw/outline the shape of the face of a monkey with a toothpick. Spread the peanut buttercream on the surface. Smooth the surface evenly. Place two chocolate chips (upside down) on the face to make the eyes. Pipe nose and mouth with the piping bag. 
  • Pat the chocolate rice cereal/coco pops on the chocolate frosting. Cut cookie in half and place the halves on each side of the cake for ears. (Note: as the coco pops will turn soft, I will like to suggest to frost the cake as close to serving time as possible.) Store any leftovers in fridge.
Recipe source: monkey cake adapted from here; banana sponge cake adapted from here.

Saturday, 22 December 2012

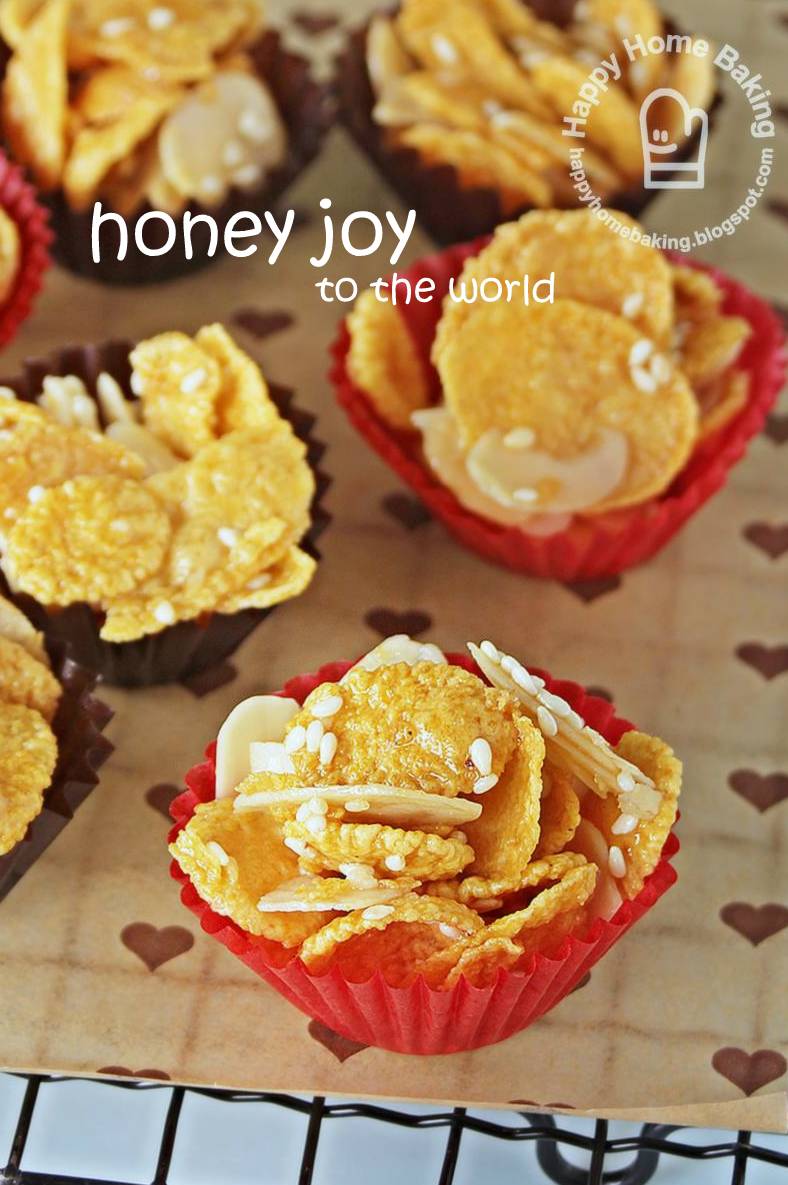
honey joy to the world

I didn't know these are known as honey joys until I came across an Australian's Women Weekly cookbook.


These honey coated cornflakes cookies or honey joys are a familiar treat during the Chinese new year. I have been looking for its recipe so that I can make them anytime of the year. It was by chance that I stumbled upon a recipe that seems close enough to the store bought ones. Besides cornflakes, the extra almond and sesame seeds greatly enhance palatability and flavour of these buttery sweet snacks, making them a real crunchy and joyful treat for anyone, on any occasion.


As the Christmas season is upon us, may simple joys and little pleasures like these honey joys bring sweet memories of the past year, and may your year ahead be sprinkled with joy and happiness!

Merry Christmas!


Honey Joys


Ingredients:

60g unsalted butter
50g honey
1 tablespoon granulated sugar
1/4 teaspoon salt
100g corn flakes
100g almond flakes, lightly toasted
3 tablespoons white sesame seeds, lightly toasted


Method:
  1. Place corn flakes, almond, sesame seeds in a big mixing bowl.
  2. Melt butter, honey, sugar and salt in a saucepan, stir to combine. Remove from heat and pour mixture over the corn flakes, almond and sesame seeds. Keep mixing with a spoon until evenly coated.
  3. Spoon cornflake mixture into mini paper case and bake on baking tray at 150°C for 12-15 minutes until golden. Cool completely, store in airtight container.
Recipe source: adapted from here.

Friday, 7 December 2012

Mini Oreo Cheesecake

To my regular visitors, my apologies for the long silence.

To make up for my tardiness in updating this blog, here's a little treat from my kitchen to yours...
mini upside down oreo cheesecakes...


A month ago, I was quite caught up planning for a holiday trip...it was a last minute decision as we almost gave up the idea when we couldn't get on the flight. By chance or fate, (or rather, thanks to my never-give-up attitude of checking the airlines system every other few hours) I managed to get all of us booked on the same flight. As we neither speak or read Korean language, I had to make sure I did a thorough job of getting into the minute details to prevent any hiccups during our trip. My 'strengths' in micro-managing pays off. Everything went well, we got to visit the places we had planned and didn't have much problem finding the popular makan(eating) places. As usual, we were on a shoestring budget, everything was DIY, backpackers style...only difference was, instead of carrying backpacks we maneuvered the busy streets and from train stations to stations with cabin bags in tow ;)


Our holiday trip was a real short one...time flies and in no time we are back to our daily mundane lives :(
In between doing loads after loads of laundry, I took time to 'spot clean' my fridge. Lying in the fridge was this block of cream cheese, crying out loud to me that I was right on time, it would exceed the expiry date the very next day!

Instead of procrastinating and end up having to throw it into the bin the next day, I googled for suitable recipes that calls for cream cheese. I remember seeing some oreo cheesecake recipes some time back, and it was a good thing that the recipe requires very basic baking ingredients, and, I am never short of oreos! The only problem was, I didn't have any sour cream on hand, but I do have yoghurt in the fridge. I went ahead and replaced the sour cream with yoghurt. I guess not much damage was done...


I baked them with paper muffin cups...one whole oreo cookie is placed inside each cup before filling it up with the batter. The preparation was rather fuss free, quick and simple. I followed the baking time but extended it for another couple of minutes as I did the skewer test and the centre was still wet although the top was set. For fear of over baking, I turned off the heat even though the inside was still not set. I believe they would be fully set in the fridge (upon cooling, the cakes have to be chilled in the fridge before consuming).


My little baking retreat was a great success. These mini cheesecakes were really delicious, and I thought they looked very lovely with the oreo cookies on top :)

They are excellent after dinner treats even though I am not an oreo fan, and I am sure they would jazz up any tea time tables especially when there are guests around ;)


Mini Oreo Cheesecakes

Ingredients:
(makes about 10)

15 Oreo cookies (10 leave as whole, 5 remove cream and coarsely chopped)
8oz pack cream cheese, room temperature
50g caster sugar
1/2 teaspoon vanilla extract
1 large egg, lightly beaten, room temperature
60g sour cream (I replaced with plain yoghurt)

Method:

  1. Preheat oven to 135 DegC (275°F).
  2. Place one whole cookie in each of the 10 muffin paper cups (or line muffin tins with paper liners). 
  3. Beat cream cheese with an electric mixer (medium high speed) until smooth. 
  4. Add in sugar, beat until just combined, scrape down the sides of the bowl when necessary.
  5. Add in vanilla extract, beat until just combined. 
  6. Gradually drizzle in the egg, beat to combine, scrape down the sides of the bowl when necessary. 
  7. Add in sour cream, beat till just combined. 
  8. Add chopped cookies, fold with a spatula. 
  9. Fill each muffin cup almost to the brim. Bake for about 22~25 minutes until the filling is set and not jiggly. Transfer to wire rack, leave to cool completely. Cover or store in airtight containers and leave to refrigerate at least 4 hours or overnight. When ready to serve, remove cake from muffin cups, serve cookies sides up.

Recipe source: adapted recipe from here.