Sunday, 25 December 2011

towering high

Warm, buttery scones are such a delight to wake up to, especially on a Sunday morning.

The problem with baking away from home is, I could only stick to very simple bakes that require minimal use of baking equipments or tools. Baking up a batch of scones is probably the simplest way to stop my itch for baking. They can be put together without using a whisk nor a spatula.


It was one of those rare occasion when I felt really proud of myself when I took out this tray of towering high scones from the oven.


Look at how tall these scones have rose from a mere 1 inch thick rounds. They have doubled their height after spending not more than 15mins in the oven. These are the tallest scones I have ever made! Thanks to a recipe that I came across not too long ago. The trick for yielding towering high scones lie in 'folding' the dough a few times...almost the same concept as making the pastry dough for croissants. I have came across similar recipes that call for rolling out the dough and making 'envelop' folds and repeating it a few times. However, I was a little skeptical as I have came across too many scone recipes that often warn you not to over work the dough. This recipe that I followed recommends a slightly different method of doing the folds. Instead of rolling the dough out with a rolling pin, the dough is gently pat down lightly before it is cut into halve. Then, one half is stacked over on the other before the stacked dough is pat down again. The process is then repeated a couple of times. I am all for this method as I am confident that I wouldn't over handle the dough too much.


I bought this lovely cookie cutter from a tiny baking supply shop in Sanlitun (三里屯). My children and I were walking towards the bus station after a light lunch at Sanlitun village when I spotted the signage of this shop from a distance. I didn't even notice its existence when I passed by the same lane, twice. There are only three display racks inside the shop, yet I managed to buy 2 cookie cutters, some cocoa power, cake flour, dried cranberries and even birthday candles ;)

I used this cutter to cut out the scones since it is the same size as recommended in the recipe. As expected, the scones didn't retain the flower shape after baking...but the height of the scones more than compensated for the lack of visual appeal.


I actually felt half-hearted when I started working on the dough, which was dry compared to the sticky and softer doughs that I am more familiar with. I was expecting a total failure and I felt like kicking myself for replacing fresh strawberries, as called for in the original recipe, with dried cranberries. However, much to my delight, the scones turned out wonderfully light and fluffy, and very tall! These freshly baked scones were so delicious that they were good even on their own. All I needed was just a cup of hot coffee to go with them. They certainly worth the extra effort to wake up slightly early to make them for my family. I have never woke up to the smell of buttery scones baking in the oven, but I am sure it must be a very nice feeling...


Towering High Cranberries Scones

Ingredients:
(makes about 9, using 4cm cutter)

200g cake flour
2 teaspoons baking powder
50g unsalted butter, Cold, cut into small cubes
30g caster sugar 1 pinch of salt 90ml milk, I replaced with plain yoghurt
40g dried cranberries, cut into smaller pieces

extra 1 tablespoon milk for brushing
some icing sugar for dusting

 Method:
  1. Sieve cake flour and baking powder into a large mixing bowl. 
  2. Place unsalted butter into mixing bowl. With a fork, cut the butter into the flour mixture until it resembles coarse crumbs. 
  3. Add in sugar, salt and dried cranberries, toss gently until just combined. 
  4. Add in milk, gather the mixture to form a rough dough. 
  5. Place dough on lightly floured work surface. Knead the dough gently for about four to five times. -
  6. Pat the dough to a rectangle shape, about 3cm thick. 
  7. Cut the dough into half. Stack one half over the other. Pat the dough into 3cm thick rectangular shape again. 
  8. Repeat the above step for another 2 times (note: handle the dough lightly, scones will become tough when over handled.) 
  9. Finally, pat the dough into 2cm-2.5cm thick. Use a lightly floured cookie cutter (4 cm diameter), cut dough into rounds. To ensure better rise, press the cutter straight down, do not twist the cutter. - Gather the remaining dough, pat into 2cm - 2.5cm thick and cut out the remaining rounds. -
  10. Place the rounds on baking tray (lined with parchment paper) about 1 inch apart, brush top with milk, sprinkle with icing sugar (I replaced with caster sugar since I couldn't get icing sugar). 
  11. Bake in preheated oven at 200degC for 10-12mins or until lightly browned. Transfer to wire rack to cool, serve warm.
Recipe source: 幸福烘焙工坊, by 本间节子

Wednesday, 14 December 2011

for the lazy baker

Pardon my absence from the blogging world...although I doubt I would be missed by anyone ;)

I am quite disappointed that I am not able to visit my regular blogs here in Beijing. Even though I have set my google readers before leaving home, nothing shows up when I tried to access it here. Well, guess I have to do a lot of catching up when I get back by the end of the year.

Although I am away from home, I don't really feel like I am on holidays. Other than the cold weather and the rather laid-back weekends, our weekdays are just like any other day. My kids will spend the mornings doing their holiday assignments while I reply emails to friends, do my groceries and prepare lunch. In the afternoons, my boys are very much pre-occupied with watching cartoons, playing games and letting off their energy by playing table tennis at the fitness centre. Life is pretty much as usual.


I still get to do my baking, at least once a week, if not more.


One of my latest bake is none other than a simple pizza for our dinner last night.


Believe it or not, this pizza requires No Kneading at all. Perfect for a lazy baker like me!

I have made this once, before I left home for Beijing. It was so good that I recommended it to my cake friend right away. She couldn't resist the temptation to make it for her family after I showed her pictures of my boy tucking away into a hearty slice of homemade pizza. I had to share the idea with her since she was the one who introduced me to her magical rolls

...that is, The Pioneer Woman's cinnamon rolls. I used the exact same dough recipe for the pizza base, so, no kneading is required. I did make some slight adjustments, ie, I replaced the milk with plain water, and this time, I also cut down the sugar amount a little (as suggested by my cake friend) so that the pizza base would not taste as sweet. Her's turn out great as well! Even though she didn't take any pictures, I had no difficulties conjuring an image of her boys and hubby wolfing down her delicious, made from scratch, homemade pizza.


I managed to make two pizza from the small batch version of the original PW's cinnamon dough recipe...a big regularly one to fit the drip pan, and a small round 8" 'personal' pan pizza.

Just like making the cinnamon rolls, the dough is as sticky and soft to handle...but after dusting it freely with flour, I was able to flatten the dough and spread it out as thin as possible...no rolling pins required, since I don't have one on hand. Unlikely most pizza doughs, this one is sooo 'baby-bottom' soft that it doesn't shrink back while trying to flatten it. One thing to note is, I spread the dough out directly on the parchment paper...it makes handling the dough much easier.


For once, I didn't make any hawaiian pizza for my children. Instead, I topped it with fresh white button mushrooms, salami slices, capsicums, mini tomatoes...


The texture of the pizza base is very soft and very bread-like...great if you like pan pizza. I love how the combination turns out...especially the fresh, juicy toppings :)

What more can I say, nothing beats a slice of homemade pizza, especially when it doesn't requires much effort. A truly, kneadlessly simple, everyday meal that everyone can put it together, either for their own indulgence or for their loved ones...

so, what are you waiting for?!


No Knead Pizza Dough

Ingredients:

1 cup water
1/4 cup vegetable oil
1/4 cup caster sugar (I used 40g)
1 1/4 teaspoons active dry yeast (I used 1 teaspoon Instant yeast)
2 (250g) cups plus 1/4 cup (30g) plain flour
1/4 teaspoon baking powder (heaping)
1/4 teaspoon baking soda (scant)
1/4 tablespoon salt (heaping)

extra flour for dusting

pizza toppings and grated mozzarella cheese


Method:
  1. Mix water, sugar and vegetable oil in a pan. Scald (heat until just before boiling) the mixture. Leave to cool for 45mins ~ 1 hour.
  2. Place 250g (2 cups) plain flour and Instant yeast in a mixing bowl. Make a well in the centre and add the above mixture. Stir with a spatula until the mixture comes together to form a thick batter. (If using Active Dry Yeast, sprinkle the yeast into the mixture and let it sit for a minute before adding it to the plain flour.) Cover and let the batter sit for at least 1 hour.
  3. Add in the remaining 30g (1/4 cup) flour, baking powder, baking soda and salt. Stir until the mixture comes together. Either go ahead to make the pizza or cover and leave to chill in fridge over night or until needed. If left to chill, check the dough and punch it down by folding with a spatula if the dough rises almost to the rim of the mixing bowl. (Note: dough will be easier to handle if left over night.)
  4. When ready, place a sheet of parchment paper on a baking tray. Dust parchment paper generously with flour, transfer dough onto parchment paper. Dust dough freely with flour, dust hands with flour, flatten and roll out the dough into a thin round or rectangular shape, as desired.
  5. Spread dough with a layer of pizza sauce, top with some grated mozzarella cheese. Arrange toppings over the surface evenly. Top with more grated mozzarella cheese, bake in preheated oven at 200degC for about 15 mins or until the pizza base turns golden brown and the cheese melted.
Recipe source: pizza dough recipe adapted from The Pioneer Woman's cinnamon rolls

Friday, 2 December 2011

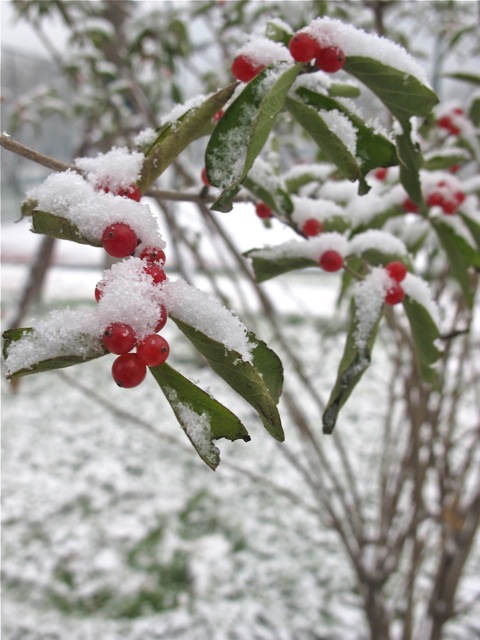
let it snow...

2 December 2011…


Friday…


0 deg C


First snow...


in Beijing...


This is our third winter in this city…


but it was only this morning…


we saw the first snow…falling…


down, from the Beijing sky…


snow...


snow...


and more snow...


My boys had a great time, playing in the snow…
I had a great time, watching them playing in the snow…
We are looking forward to the next snow…

Oh please,

Let it snow, let it snow, let it snow…


Wednesday, 30 November 2011

baking away from home

(the photos in this post appear faded and washed out, which is intentional...)
Nothing beats a nice, warm homemade muffin over a cup of hot coffee, especially in a cold, wintery afternoon.


These banana raisins muffins are the very first bakes I made in the tiny kitchen of this small service apartment that we will be staying for the next few weeks. The kitchen area is not more than 1.5m by 1.5m, but it is very well equipped. Besides the basic utensils, there is even a spatula and a stylish balloon whisk.


Knowing that I will miss baking for the entire period that we are away, I brought along my digital weighing scale, a small pack of caster sugar, and at the very last minute I stuff in a pack of flour into my luggage, just in case. I had reminded myself to bring along some disposable foil pans but had totally forgotten about muffin cups. Luckily, I manage to get some while shopping for groceries here, if not, I am sure my cyberfriend, VB would be more than eager to dispatch some over to me ;)


I have on hand some very rippped bananas, a small pack of raisins, eggs, vegetable oil, sugar, flour and baking powder. With just a few strokes, these basic ingredients was magically transformed into a batch of soft and fluffy muffins. I stood by the oven to watch how the muffins ballooned and domed…at the same time letting myself engulfed in the wonderful sweet aroma of banana muffins baking in the oven.


The oven in the apartment didn't disappoint me. I really like how these muffins turn out…the crust is a little crisp, yet the centre is very soft and moist. One of the simplest pleasures in my life…is to be able to sink my teeth into a delicious medley of fluffy crumbs, tiny chunks of bananas and sweet, plumped raisins. A simple cake is all I need to keep me very happy the whole day :)


Banana Raisin Muffins

Ingredients
(makes 7 muffins)

50g caster sugar
2 eggs, lightly beaten (about 50g without shells)
50g vegetable oil (I used canola oil)
2 large over ripped bananas, roughly mashed (about 210g)
150g cake flour
1 ½ teaspoons baking powder
50g raisins

Method:
  1. Pre heat oven to 180degC.
  2. Soak raisins with some water or orange juice for about 10-15mins. Drain and pat dry. Lightly coat with a teaspoon of flour (extra), remove any excess flour.
  3. Sieve flour and baking powder, set aside.
  4. Roughly mash bananas with a fork.
  5. Place sugar, eggs in a mixing bowl. Whisk with a balloon whisk to combine.
  6. Add in oil, whisk to combine.
  7. Add in mashed banana, stir with a spatula to combine.
  8. Sieve over flour mixture, stir with spatula until just incorporated. DO NOT Overmix. The batter should appear lumpy.
  9. Spoon batter into paper muffin cups, fill to ¾ full.
  10. Bake at 180degC for 25mins until golden and a toothpick inserted into the centre comes out clean. Transfer to wire rack, leave to cool completely.

Tuesday, 22 November 2011

Just another day

It was the first Monday morning of the school holiday…just like any other day for me...

After a not so good sleep the previous night (maybe the bed was too comfortable?), I went about doing the usual chores that I would usually do back home…woke the elder boy up (the younger one has got an internal alarm clock in his body), prepared breakfast…the usual bread with coffee or milk for the boys…but for once for after a long break, I got to send my better half to work in the morning.

After pottering around doing this and that to get everything organised, I left the kids in the apartment and went off to the nearby local supermarket to get some groceries. My boys were too engrossed with the monopoly card games they got from the friendly air stewardess the day before…after working for 2 hours on their assessment books right after breakfast, they were not too keen to venture out into the cold.


The temperature was about 6 deg C when I got out of the house in the late morning. A lovely sight greeted me in the cold, and yet nice and comfortable weather in Beijing….a colourful fruit stand!


Next to it was a messy, make shift vegetable stand…


A huge pile of Chinese cabbage by the roadside…definitely not a common sight back home…

There was a good variety of vegetables, from leafy spinach, to cucumbers, colourful capsicums, mushrooms, onions, etc…

What caught my eyes were these big red tomatoes…nothing close to their small, yellowish orange cousins back home. I asked the friendly Ah Yi (Chinese for aunt) whether these taste better than those small mini ones I spotted in another crate (which by the way looked like some expensive vine ripped tomatoes). She assured me that these bigger ones were good…she then pointed to a small pile of red, squashed skins on the ground behind where she was standing, and told me she just finished eating one (^_^''') I bought just two fruits to try, telling her I would come back for more if they were really good. I paid $1.60 yuan for two huge tomatoes which works out to be less than 40 cents in Singapore. I also bought some fresh white button mushrooms, which cost less than one third the price.

I took about 5 mins to walk back to the apartment...savouring the sights of this quiet neighbourhood, a great contrast to the bustling main streets just a few hundred metres away. I felt as though I am a local, I bet no one would think I am a foreigner as long as I don't open my mouth, haha! Even though I speak Chinese, my accent will give me away. The locals could tell from my accent that I am from the South, although not many would have guess correctly that I come from the little red dot.

I got back in time to prepare a simple lunch and my kids spent the rest of the afternoon doing art and craft…


It was the first time their Chinese calligraphy teacher instructed my elder son to practise writing during the holidays…being a very obedient student, he brought his brushes, writing materials and ink along. Despite having attended weekly lessons for the past 7 years, he still has got a long long way to go before he could master this Chinese art…


The younger fellow spent his time working on this mulberry paint artwork (mulberry paint is made from the bark of Mulberry tree). It is quite a tedious task trying to 'stick' tiny lumps of damp, pulp-like stuff onto the template with just tweezers and a pointer. There is actually a warning stated on the package…ie. kids shouldn't spent more than 30mins on it if not they may faint! Well, my child really enjoyed doing this craft, he told me he didn't faint even thought he had already been working on it for more than an hour ;)

After a light, home cooked dinner, my boys managed to persuade their daddy to play card games with them, while I unwind in the couch…playing my favourite role as a couch potato ;)

That pretty sums up my first day in Beijing…just like any other day, hope I didn't bore you to death! And oh, by the way, the red tomatoes were really good, I cut one into wedges and ate it like a fruit, even my boys ate them without a wince…I wouldn't say it tasted very sweet, but it was juicy and not sour at all, it definitely won't leave you with a tart tomato-y after taste! I could imagine having them for breakfast, lightly roasted and topped with some salt and black pepper :D

This post is published via email, I hope it works well, but my photos may not appear clear or sharp as they were all taken with my iphone. I will try to update this blog as regularly as I could...will love to share with you any interesting sights and food that I come across during my short stay here in Beijing.

Saturday, 19 November 2011

cake in a cup

It is more than a month since I last baked something! I was so caught up with cleaning up the house, clearing the clutters, removing old textbooks to make room for new ones, and shopping for winter clothes and gears for our trip. When I have time to take a breather, I would be crawling over the web, looking for ways and means...to climb over the Great fire Wall of China.

We will be spending the year end school holidays in China, where blogger, wordpress, youtube, facebook, twitter are all blocked. After testing out a few alternative ways of climbing over the great firewall, I managed to find a possible solution to update my blog without having to access Blogger. The one that works well is to publish a post via email. So instead of creating a new post in blogger, I have to compose the post within an email. It will be posted once I sent it to my mail2blogger address. The next issue is, how to view my blog post or visit the blogs that I frequent...the way to get around it is to read blog updates via Google reader. However, I won't be able to view the images, only text will be displayed, I tested out RSS feed reader, but it didn't work well. The worst is, I won't be able to leave any comments on blogs or reply to any comments or questions on my own blog post. I will have to be a silent reader until we return...so pardon me if I am not able to answer your questions promptly. Well, at least I get to update my blog!


In my attempt to clear the leftover ingredients in my fridge, I planned to make my favourite Fruit Pastry Cake. However, to save time from lining my cake pan, I baked the cake in paper muffin cups. I also took the liberty to cut down on the sugar amount from 150g to 120g. To speed things up, I transfered the finished batter into a clear plastic bag, snipped off a corner of the plastic bag, and used it like a piping bag to fill up each paper cup. Not only it makes spooning of the batter so much easier, it was neater and no mess!


But, my brain has gone rusty...blame it on the long break in between my baking sessions...when I was about to put the tray of filled paper cups into the oven, I was greeted with a 'dark' oven. I had totally forgotten to turn on the oven! There was no choice but to let the batter wait for the oven to be preheated. I thought it was going to be a gone case...but to my surprise, the cake rose high up over the rim just 15mins into baking :)


Thanks to my baking fairy, the blunder I made didn't affect the texture or taste of the cake at all. Even though it is a cake, it is quite similar to a muffin. It was a real breakfast treat for me as I haven't had any homemade cakes for weeks.

Although this is not a cupcake per se, I will like to submit this Blueberry Cake in a cup to Aspiring Bakers #13: Enjoy Cupcakes! (November 2011), hosted by Min's Blog. I hope it will be accepted :)


Blueberry Cake in a cup

Ingredients:
(makes about 9 cupcakes)

100g unsalted butter, soften at room temperature
120g caster sugar
50g yogurt (plain or blueberry flavour)
3 eggs, (medium size) lightly beaten, room temperature
1 teaspoon pure vanilla extract
210g plain flour
1 teaspoon baking powder
some fresh blueberries


Method:
  1. With an electric mixer, cream butter and sugar till light and fluffy. Add yogurt, mix to combine.
  2. Dribble in the eggs gradually and beat till incorporated in the batter. (The mixture may appear slightly curdled.)
  3. Add vanilla extract, mix to combine.
  4. Sieve over flour and baking powder and mix with a spatula till smooth.
  5. Spoon batter into paper liners, fill it to about 3/4 full. Top with some fresh blueberries (if using frozen berries, do not thaw).
  6. Bake in pre-heat oven at 180degC for 25-30 minutes until golden or a skewer comes out clean when inserted into the centre. 
  7. Transfer to wire rack to let cool completely. Dust the top with some icing sugar if desired. Serve warm.

Friday, 4 November 2011

cooking without a recipe

I have never baked anything without following a recipe closely...the same thing doesn't seem to apply when it comes to cooking...


I don't usually follow any recipes when preparing our daily meals...unless it is a special dish...


While we were heading towards the supermarket entrance I asked my elder child what would he like to have for lunch today, he came back with, "How about pasta salad?"

And so the two us spent the next 10mins picking up the ingredients and we were soon on our way home. I had about 45mins before my younger child came knocking on the front door...the timing was just right, although I would love to take a 15mins rest instead of having to prepare lunch right away.


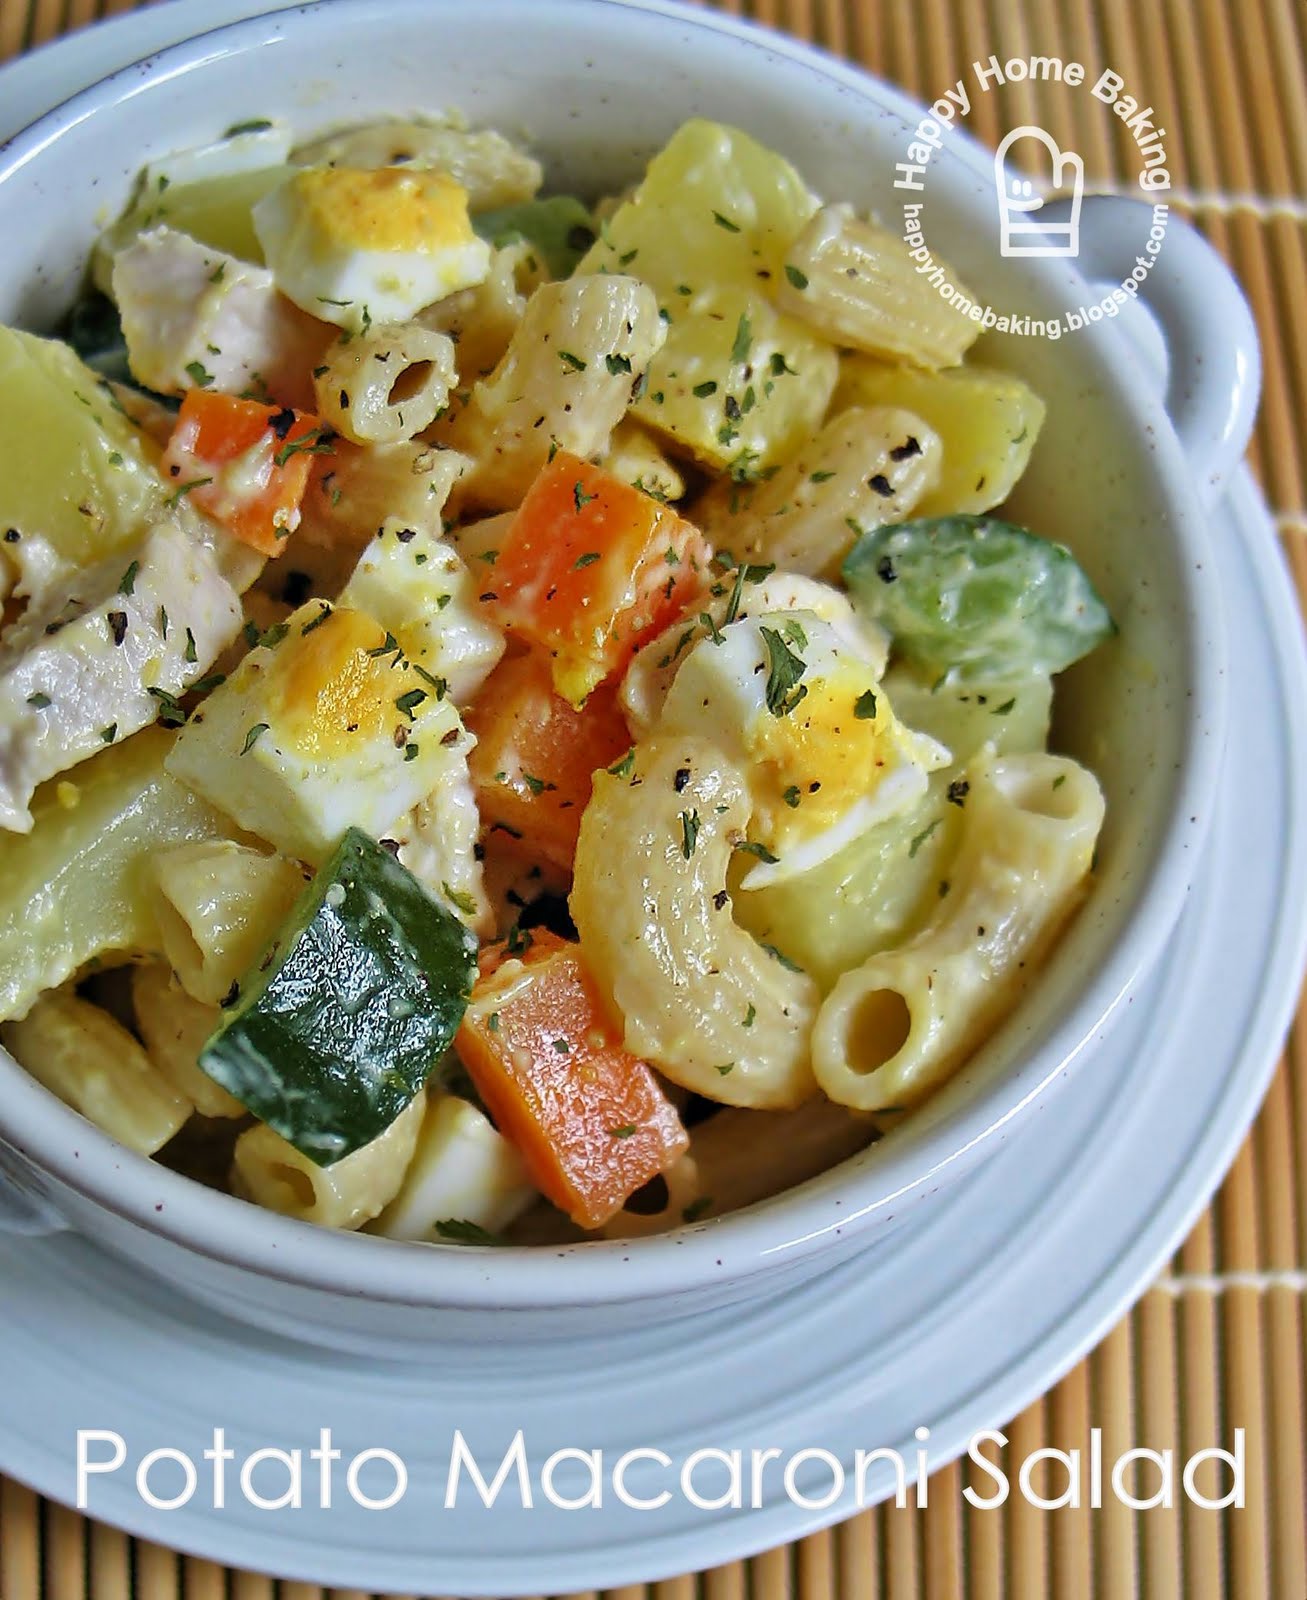
Here's our simple lunch today...potato macaroni salad with chicken breast, carrots, Japanese cucumbers, and hard boiled eggs. I used two separate pots to cook the ingredients so as to speed things up...the sequence of cooking the ingredients are important when you want to save time. The first two ingredients to be cooked were the hard boiled eggs and the macaroni as there is no preparation required...while they were boiling away,  I diced the carrots, potatoes and the cucumbers. Then I boiled the potatoes, blanched the carrots and cucumbers, and cooked the chicken breast. While these were cooking, I removed the shells of the eggs and cut them into chunks. Everything was drained and placed in a big mixing bowl...I added some salt, freshly cracked black pepper, dried parsley and some mayo, just enough to coat the ingredients. I even managed to clean and tidy up the kitchen counter before my son stepped into the house.

I must say this dish is good to serve as a side...somehow, something is lacking when eaten as a meal on its own. But we still enjoyed our simple lunch...although the younger boy did make a comment that it would be good if I had cooked him some soup, especially when the weather was nice and cooling. Will certainly remember to do so the next time...

Friday, 28 October 2011

Another lesson learned...

With the on-going year end school exams, the school term for the year is drawing to a close. As usual,  at this time of the year, I try to stay away from the 'baking and blogging world' so that I could divert my attention to coach my children in their studies.

Ever since I quit my job to stay at home to look after the kids, I have been treating the scores on their report cards as my annual performance review. Any favourable comments from teachers on my children's behavour and conduct in school, plus whatever little achievements they have accomplished for the year will be treated as bonus points. Of course, I won't be penalised if they don't do well in their studies, neither will I get a fat bonus or increment if they have achieved excellent academic results. Not that I am expecting any rewards in return, but their academic performance is the only way for me to judge whether I have done my part as a stay-at-home-mum. If they don't do well, I will feel that it is my fault. I know, it sounds silly, but, for the time being this is the only yardstick for me to evaluate whether I have put in my best effort to guide my children. It also serves as a warning sign, if they don't do well, I better cut down my time spent on the blogosphere ;)

Ok, enough of ranting, let me bring you to my recent bake...


Well, I hope you won't get bored with yet, another chiffon cake post! I can't help but to share with you this not-so-clear image of the cake baking in the oven. The cake ballooned as the clock ticked away...it made my ego swell at the same rate as I watched the cake rose and bloomed nicely. 


In the midst of helping my younger child to prepare for his exams, I am also trying my best to clear away as many ingredients as possible since we will be away during the school holidays. I finally put my hands together to make this Sakura Chiffon cake as the preserved sakura and sakura paste my dear cyberfriend VB gave me many months back was near expiring.


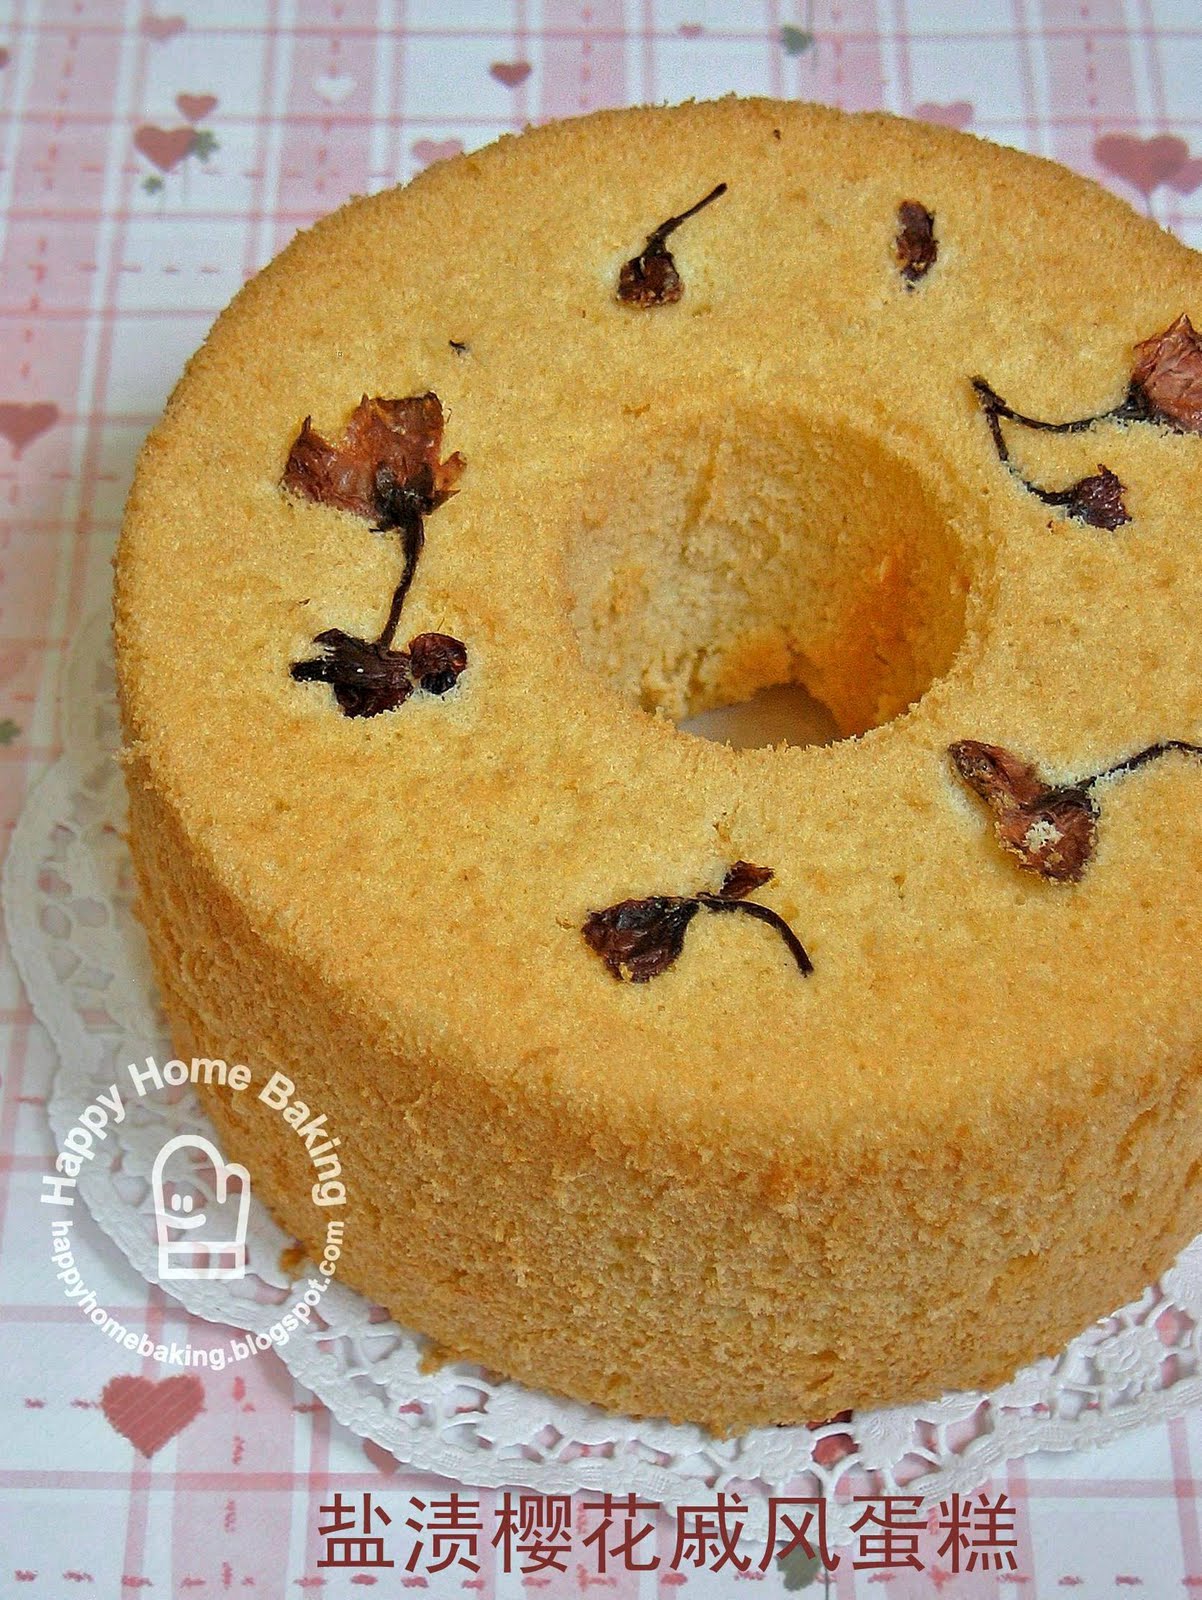
The sakura flowers were preserved with salt, but even though I soaked them for 30mins, the petals still tasted a little salty. Don't ask me how does sakura smell like...I wasn't able to detect any floral fragrant, not during baking or when the cake was left to cool. Except for the slight salty taste (not the salted fish or salted vegetables kind of salty), the cake tasted like an ordinary sponge cake, or 鸡蛋糕. Sad to say, the sakura paste or sakura essence, did not add any flavour to it, it did not even add any colour to it. I had imagined that the pinkish essence would turn the batter into a nice pinky batter...but no, it has no effect at all :(


Although I was quite disappointed with the sakura, I did manage to learn something from this bake. I have actually made two chiffon cakes, the first one was meant to be a trial. With the lesson learned from the first attempt, I baked the same cake again and gave it away.

For the first cake, I followed the ingredients amount as stated in the recipe, ie 50ml vegetable oil and 50ml water. However, I noticed the yolk batter was quite thick, and I deflated the whites a little while trying to mix the two together. The finished cake was not as airy or fluffy as the fruit tea chiffon I made earlier. I compared the two recipes and decided to change the water-oil amount. So, for the second sakura cake, I used 40ml oil and 60ml water, just like the fruit tea chiffon. The yolk batter was not as thick, and I could fold in the whites easily. The second cake rose tall and mighty. Even though I wasn't able to taste it, I am confident that the texture would be quite similar to the fruit tea version.


These slices were from the first cake...the texture was not as moist and tender as the fruit tea ones, mainly because I have deflated the whites. If I ever have the chance to make this again, I will likely add matcha powder to enhance the flavour.

Nevertheless, it was another good baking experience for me...at least now I know, the petals that were lined on the base of the tube pan would remained intact, they were not buried or covered by the batter. Without using any special tools or taking extra care, I didn't even rid them off while I was unmoulding the cake from the pan. Till now, I still find this rather amazing!


Sakura Chiffon Cake

Ingredients:
(for 7" tube pan)

3 egg yolks (use large eggs*)
20g caster sugar
40ml vegetable oil (original recipe use 50ml)
60ml water (original recipe use 50ml)
1 teaspoon sakura paste (original recipe use dried sakura leave powder)

80g cake flour

4 egg whites (use large eggs*)
50g caster sugar

some preserved sakura

(*I used eggs with a nett weight of 55g, about 20g yolk, 35g white)

Method:
  1. Rinse the preserved sakura to remove any excess salt. Leave to soak for 30mins. Drain and pat dry on paper towels. Line the dried sakura petals on the base of a 7" chiffon tube pan. Set aside.
  2. Sieve flour and set aside. 
  3. Place egg yolks in a mixing bowl. With a manual hand whisk, whisk the yolks a little. Add in sugar and whisk to combine.
  4. Add in vegetable oil gradually, whisk to combine. 
  5. Add in water gradually, whisk to combine. Add in sakura paste, whisk to combine. Sieve over the flour and whisk till the flour is fully incorporated. Do not over mix. Set aside.
  6. In a clean, dry mixing bowl, beat egg whites with a handheld electric mixer on low speed until mixture becomes frothy and foamy.  Add half of the sugar amount and turn to high speed and beat the mixture. Continue to add in the remaining sugar and beat until the egg whites reaches the soft peak stage.The soft peak stage is reached when the peaks of the whites curl over and droop slightly. The egg whites should appear smooth and glossy. (Do not over beat the whites still stiff, it is better to beat the whites still soft peaks for easy folding with the yolk batter.)
  7. Add the beaten egg whites into the egg yolk batter in 3 separate additions, each time folding gently with a spatula until just blended.
  8. Pour batter into the prepared pan (do not grease the pan). Smooth the top with a spatula if necessary. Tap the pan lightly on a table top to get rid of any trapped air bubbles in the batter. (Note: the finished batter should be thick and airy, and should be able to fill up the pan to about 90% full or not less than 2cm below the rim)
  9. Bake in pre-heated oven at 180 degC for 30 mins, or until a toothpick inserted into the centre comes out clean, when lightly pressed the cake will spring back. Invert the pan immediately and let cool completely before unmould. To remove the cake from the pan, run a thin-bladed knife or a off-set spatula around the inside of the pan and the center core. Release the cake and run the knife/off-set spatula along the base of the pan to remove the cake.
Recipe source: adapted from 好吃戚风蛋糕轻松上手, 福田淳子

Saturday, 15 October 2011

fruity

I have been wanting to replace my old chiffon cake pan for ages, but each time I visit the baking supply store which I got the pan from, I always came back empty handed. You see, I only like those chiffon pans that come without 'legs'. Besides offering aesthetic appeal (trust me, I don't care too much about fashion, but I am a bit uptight when it comes to baking pans!), they come in the exact size that I want...that is, 7" pan instead of the usual bigger 8" or 9" ones for those with legs.

As usual, when I popped by the baking supply store two weeks ago, I walked over the baking pans section to look-see look-see. I was so happy when I spotted the 7" chiffon pans on the rack, and best of all, there are no legs on them! Oh, how I love the nice matte finishing on the surface!

The first thing I got home was to compare the new pan with the old one. Even though the label says 17cm pan size on the new pan, it is slightly bigger than my old one. The new pan is 18cm actually, and it is also at least 1 cm taller than the old one. I also noticed how 'straight' the sides are, which make the pan appear deeper.

With the knowledge that the new pan is slightly bigger, I was a bit hesitant to try out the recipes from my trusted chiffon cake book. My old pan works fine with recipes that call for either 3 whole eggs or those that use 3 yolks and 4 whites. I was skeptical that there will be enough batter to fill up the pan, and so, typical me, I procrastinated...


But well, I didn't wait too long...I just couldn't get rid of the increasing itch to test out the pan ;)

To minimise wastage and disappointment, I decided on a recipe that uses the least expensive ingredients...a tea chiffon cake. I have been wanting to try make a chiffon cake with Lipton's forest fruit tea...my current favourite tea. You will be amazed by the wonderful aroma from a cup of pipping hot fruity tea...something you won't expect from this sort of 'everyday' kind of tea bags. I could smell the tea a couple of metres away...you need not put your nose over the cup to smell it. I am sure those who have tried this tea will know what I am talking about.


Once again, the recipe from my chiffon cake 'bible' didn't disappoint me. I was able to fill up the new pan to almost 90% full. The cake bloomed really well when it was in the oven, but I noticed it sank a little when the baking time was almost up. The finished cake shrank further, but it was still hovering around the rim. **clap clap** **happy happy**

The texture was light, fluffy and moist! This time, with the good lighting condition, I managed to get quite a clear picture of the crumb, I hope you can tell how soft and tender  it is from the picture. By the way, I am still using my very old, museums-will-like, point and shoot camera...my faithful and very much abused Canon Powershot G3 (there is G12 in the market now). It comes with a humble 4 mega pixels and the battery cannot be recharged anymore, so I got to use the ac adapter whenever I take photos of my food. I am not able to take decent photos when there is no natural light, and since I made this cake in the evening, I wasn't able to take a picture of the whole cake :( I do hope my camera can still be alive and kicking for another few years to come. Wish me luck!


Fruit Tea Chiffon Cake

Ingredients:
(for 7" tube pan)

3 egg yolks (use large eggs*)
20g caster sugar
40ml vegetable oil
60ml infused tea (infused one tea bag with about 90ml hot water, leave to cool, use only 60ml)
1 1/2 tablespoon tea leaves (from about 3 satchels)

80g cake flour

4 egg whites (use large eggs*)
50g caster sugar

(*I used eggs with a nett weight of 55g, about 20g yolk, 35g white)

Method:
  1. Infuse tea bag (use any flavour of your choice) with hot water, leave to cool completely, use only 60ml.
  2. Sieve flour and set aside. 
  3. Place egg yolks in a mixing bowl. With a manual hand whisk, whisk the yolks a little. Add in sugar and whisk to combine.
  4. Add in vegetable oil gradually, whisk to combine. 
  5. Add in infused tea gradually, whisk to combine. Add in tea leaves, whisk to combine. Sieve over the flour and whisk till the flour is fully incorporated. Do not over mix. Set aside.
  6. In a clean, dry mixing bowl, beat egg whites with a handheld electric mixer on low speed until mixture becomes frothy and foamy.  Add half of the sugar amount and turn to high speed and beat the mixture. Continue to add in the remaining sugar and beat until the egg whites reaches the soft peak stage.The soft peak stage is reached when the peaks of the whites curl over and droop slightly. The egg whites should appear smooth and glossy. (Do not over beat the whites still stiff, it is better to beat the whites still soft peaks for easy folding with the yolk batter.)
  7. Add the beaten egg whites into the egg yolk batter in 3 separate additions, each time folding gently with a spatula until just blended.
  8. Pour batter into a 7" tube pan (do not grease the pan). Smooth the top with a spatula if necessary. Tap the pan lightly on a table top to get rid of any trapped air bubbles in the batter. (Note: the finished batter should be thick and airy, and should be able to fill up the pan to about 90% full or not less than 2cm below the rim)
  9. Bake in pre-heated oven at 180 degC for 30 mins, or until a toothpick inserted into the centre comes out clean, when lightly pressed the cake will spring back. Invert the pan immediately and let cool completely before unmould. To remove the cake from the pan, run a thin-bladed knife or a off-set spatula around the inside of the pan and the center core. Release the cake and run the knife/off-set spatula along the base of the pan to remove the cake.
Recipe source: adapted from 好吃戚风蛋糕轻松上手, 福田淳子