Friday 28 October 2011

Another lesson learned...

With the on-going year end school exams, the school term for the year is drawing to a close. As usual,  at this time of the year, I try to stay away from the 'baking and blogging world' so that I could divert my attention to coach my children in their studies.

Ever since I quit my job to stay at home to look after the kids, I have been treating the scores on their report cards as my annual performance review. Any favourable comments from teachers on my children's behavour and conduct in school, plus whatever little achievements they have accomplished for the year will be treated as bonus points. Of course, I won't be penalised if they don't do well in their studies, neither will I get a fat bonus or increment if they have achieved excellent academic results. Not that I am expecting any rewards in return, but their academic performance is the only way for me to judge whether I have done my part as a stay-at-home-mum. If they don't do well, I will feel that it is my fault. I know, it sounds silly, but, for the time being this is the only yardstick for me to evaluate whether I have put in my best effort to guide my children. It also serves as a warning sign, if they don't do well, I better cut down my time spent on the blogosphere ;)

Ok, enough of ranting, let me bring you to my recent bake...


Well, I hope you won't get bored with yet, another chiffon cake post! I can't help but to share with you this not-so-clear image of the cake baking in the oven. The cake ballooned as the clock ticked away...it made my ego swell at the same rate as I watched the cake rose and bloomed nicely. 


In the midst of helping my younger child to prepare for his exams, I am also trying my best to clear away as many ingredients as possible since we will be away during the school holidays. I finally put my hands together to make this Sakura Chiffon cake as the preserved sakura and sakura paste my dear cyberfriend VB gave me many months back was near expiring.


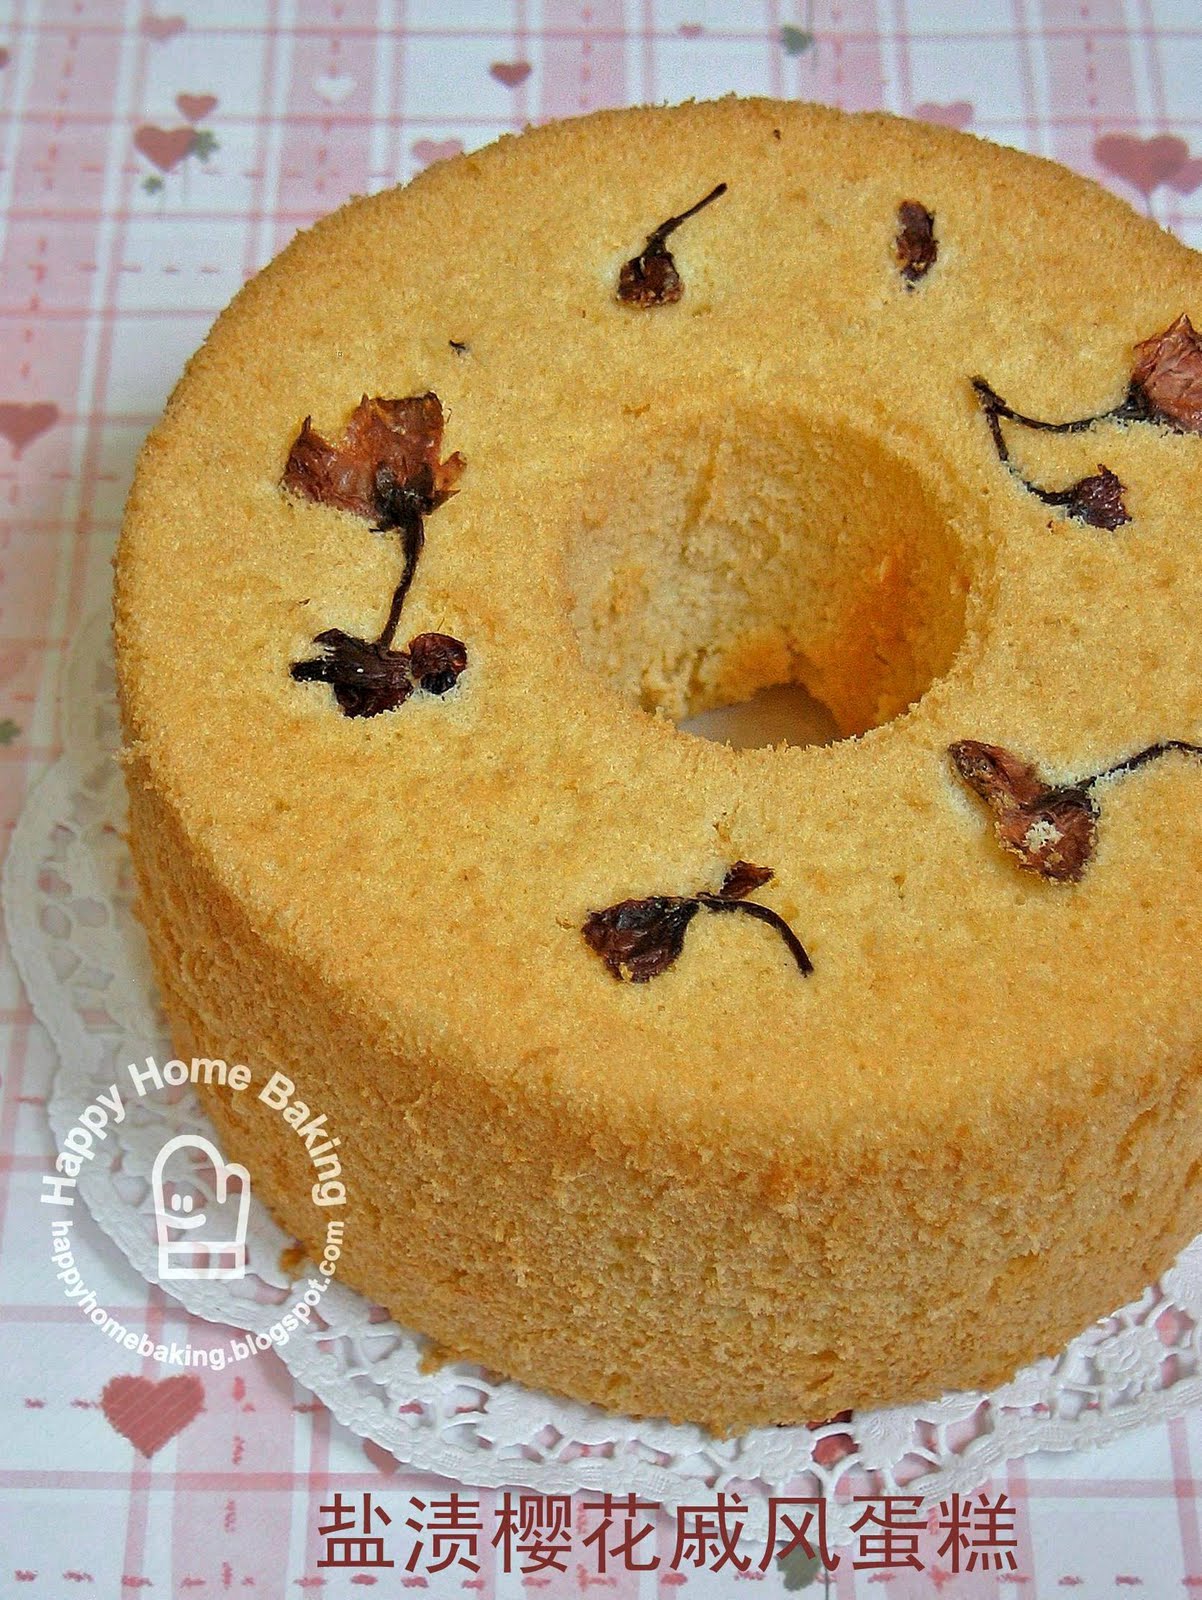
The sakura flowers were preserved with salt, but even though I soaked them for 30mins, the petals still tasted a little salty. Don't ask me how does sakura smell like...I wasn't able to detect any floral fragrant, not during baking or when the cake was left to cool. Except for the slight salty taste (not the salted fish or salted vegetables kind of salty), the cake tasted like an ordinary sponge cake, or 鸡蛋糕. Sad to say, the sakura paste or sakura essence, did not add any flavour to it, it did not even add any colour to it. I had imagined that the pinkish essence would turn the batter into a nice pinky batter...but no, it has no effect at all :(


Although I was quite disappointed with the sakura, I did manage to learn something from this bake. I have actually made two chiffon cakes, the first one was meant to be a trial. With the lesson learned from the first attempt, I baked the same cake again and gave it away.

For the first cake, I followed the ingredients amount as stated in the recipe, ie 50ml vegetable oil and 50ml water. However, I noticed the yolk batter was quite thick, and I deflated the whites a little while trying to mix the two together. The finished cake was not as airy or fluffy as the fruit tea chiffon I made earlier. I compared the two recipes and decided to change the water-oil amount. So, for the second sakura cake, I used 40ml oil and 60ml water, just like the fruit tea chiffon. The yolk batter was not as thick, and I could fold in the whites easily. The second cake rose tall and mighty. Even though I wasn't able to taste it, I am confident that the texture would be quite similar to the fruit tea version.


These slices were from the first cake...the texture was not as moist and tender as the fruit tea ones, mainly because I have deflated the whites. If I ever have the chance to make this again, I will likely add matcha powder to enhance the flavour.

Nevertheless, it was another good baking experience for me...at least now I know, the petals that were lined on the base of the tube pan would remained intact, they were not buried or covered by the batter. Without using any special tools or taking extra care, I didn't even rid them off while I was unmoulding the cake from the pan. Till now, I still find this rather amazing!


Sakura Chiffon Cake

Ingredients:
(for 7" tube pan)

3 egg yolks (use large eggs*)
20g caster sugar
40ml vegetable oil (original recipe use 50ml)
60ml water (original recipe use 50ml)
1 teaspoon sakura paste (original recipe use dried sakura leave powder)

80g cake flour

4 egg whites (use large eggs*)
50g caster sugar

some preserved sakura

(*I used eggs with a nett weight of 55g, about 20g yolk, 35g white)

Method:
  1. Rinse the preserved sakura to remove any excess salt. Leave to soak for 30mins. Drain and pat dry on paper towels. Line the dried sakura petals on the base of a 7" chiffon tube pan. Set aside.
  2. Sieve flour and set aside. 
  3. Place egg yolks in a mixing bowl. With a manual hand whisk, whisk the yolks a little. Add in sugar and whisk to combine.
  4. Add in vegetable oil gradually, whisk to combine. 
  5. Add in water gradually, whisk to combine. Add in sakura paste, whisk to combine. Sieve over the flour and whisk till the flour is fully incorporated. Do not over mix. Set aside.
  6. In a clean, dry mixing bowl, beat egg whites with a handheld electric mixer on low speed until mixture becomes frothy and foamy.  Add half of the sugar amount and turn to high speed and beat the mixture. Continue to add in the remaining sugar and beat until the egg whites reaches the soft peak stage.The soft peak stage is reached when the peaks of the whites curl over and droop slightly. The egg whites should appear smooth and glossy. (Do not over beat the whites still stiff, it is better to beat the whites still soft peaks for easy folding with the yolk batter.)
  7. Add the beaten egg whites into the egg yolk batter in 3 separate additions, each time folding gently with a spatula until just blended.
  8. Pour batter into the prepared pan (do not grease the pan). Smooth the top with a spatula if necessary. Tap the pan lightly on a table top to get rid of any trapped air bubbles in the batter. (Note: the finished batter should be thick and airy, and should be able to fill up the pan to about 90% full or not less than 2cm below the rim)
  9. Bake in pre-heated oven at 180 degC for 30 mins, or until a toothpick inserted into the centre comes out clean, when lightly pressed the cake will spring back. Invert the pan immediately and let cool completely before unmould. To remove the cake from the pan, run a thin-bladed knife or a off-set spatula around the inside of the pan and the center core. Release the cake and run the knife/off-set spatula along the base of the pan to remove the cake.
Recipe source: adapted from 好吃戚风蛋糕轻松上手, 福田淳子

Saturday 15 October 2011

fruity

I have been wanting to replace my old chiffon cake pan for ages, but each time I visit the baking supply store which I got the pan from, I always came back empty handed. You see, I only like those chiffon pans that come without 'legs'. Besides offering aesthetic appeal (trust me, I don't care too much about fashion, but I am a bit uptight when it comes to baking pans!), they come in the exact size that I want...that is, 7" pan instead of the usual bigger 8" or 9" ones for those with legs.

As usual, when I popped by the baking supply store two weeks ago, I walked over the baking pans section to look-see look-see. I was so happy when I spotted the 7" chiffon pans on the rack, and best of all, there are no legs on them! Oh, how I love the nice matte finishing on the surface!

The first thing I got home was to compare the new pan with the old one. Even though the label says 17cm pan size on the new pan, it is slightly bigger than my old one. The new pan is 18cm actually, and it is also at least 1 cm taller than the old one. I also noticed how 'straight' the sides are, which make the pan appear deeper.

With the knowledge that the new pan is slightly bigger, I was a bit hesitant to try out the recipes from my trusted chiffon cake book. My old pan works fine with recipes that call for either 3 whole eggs or those that use 3 yolks and 4 whites. I was skeptical that there will be enough batter to fill up the pan, and so, typical me, I procrastinated...


But well, I didn't wait too long...I just couldn't get rid of the increasing itch to test out the pan ;)

To minimise wastage and disappointment, I decided on a recipe that uses the least expensive ingredients...a tea chiffon cake. I have been wanting to try make a chiffon cake with Lipton's forest fruit tea...my current favourite tea. You will be amazed by the wonderful aroma from a cup of pipping hot fruity tea...something you won't expect from this sort of 'everyday' kind of tea bags. I could smell the tea a couple of metres away...you need not put your nose over the cup to smell it. I am sure those who have tried this tea will know what I am talking about.


Once again, the recipe from my chiffon cake 'bible' didn't disappoint me. I was able to fill up the new pan to almost 90% full. The cake bloomed really well when it was in the oven, but I noticed it sank a little when the baking time was almost up. The finished cake shrank further, but it was still hovering around the rim. **clap clap** **happy happy**

The texture was light, fluffy and moist! This time, with the good lighting condition, I managed to get quite a clear picture of the crumb, I hope you can tell how soft and tender  it is from the picture. By the way, I am still using my very old, museums-will-like, point and shoot camera...my faithful and very much abused Canon Powershot G3 (there is G12 in the market now). It comes with a humble 4 mega pixels and the battery cannot be recharged anymore, so I got to use the ac adapter whenever I take photos of my food. I am not able to take decent photos when there is no natural light, and since I made this cake in the evening, I wasn't able to take a picture of the whole cake :( I do hope my camera can still be alive and kicking for another few years to come. Wish me luck!


Fruit Tea Chiffon Cake

Ingredients:
(for 7" tube pan)

3 egg yolks (use large eggs*)
20g caster sugar
40ml vegetable oil
60ml infused tea (infused one tea bag with about 90ml hot water, leave to cool, use only 60ml)
1 1/2 tablespoon tea leaves (from about 3 satchels)

80g cake flour

4 egg whites (use large eggs*)
50g caster sugar

(*I used eggs with a nett weight of 55g, about 20g yolk, 35g white)

Method:
  1. Infuse tea bag (use any flavour of your choice) with hot water, leave to cool completely, use only 60ml.
  2. Sieve flour and set aside. 
  3. Place egg yolks in a mixing bowl. With a manual hand whisk, whisk the yolks a little. Add in sugar and whisk to combine.
  4. Add in vegetable oil gradually, whisk to combine. 
  5. Add in infused tea gradually, whisk to combine. Add in tea leaves, whisk to combine. Sieve over the flour and whisk till the flour is fully incorporated. Do not over mix. Set aside.
  6. In a clean, dry mixing bowl, beat egg whites with a handheld electric mixer on low speed until mixture becomes frothy and foamy.  Add half of the sugar amount and turn to high speed and beat the mixture. Continue to add in the remaining sugar and beat until the egg whites reaches the soft peak stage.The soft peak stage is reached when the peaks of the whites curl over and droop slightly. The egg whites should appear smooth and glossy. (Do not over beat the whites still stiff, it is better to beat the whites still soft peaks for easy folding with the yolk batter.)
  7. Add the beaten egg whites into the egg yolk batter in 3 separate additions, each time folding gently with a spatula until just blended.
  8. Pour batter into a 7" tube pan (do not grease the pan). Smooth the top with a spatula if necessary. Tap the pan lightly on a table top to get rid of any trapped air bubbles in the batter. (Note: the finished batter should be thick and airy, and should be able to fill up the pan to about 90% full or not less than 2cm below the rim)
  9. Bake in pre-heated oven at 180 degC for 30 mins, or until a toothpick inserted into the centre comes out clean, when lightly pressed the cake will spring back. Invert the pan immediately and let cool completely before unmould. To remove the cake from the pan, run a thin-bladed knife or a off-set spatula around the inside of the pan and the center core. Release the cake and run the knife/off-set spatula along the base of the pan to remove the cake.
Recipe source: adapted from 好吃戚风蛋糕轻松上手, 福田淳子

Wednesday 12 October 2011

one at a time...

It all started during our makan trip (food trip) to Malacca (hop over here for our trip review)...

at one of the rest stops along the highways, my elder child spotted a sign in front of a food stall, written on it were the words "Ondeh Ondeh". While we queue up to get our drinks, he picked up his courage (after much hesitation...he is a very very shy boy, almost an introvert...) and went over to the stall to get the ondeh ondeh...one of his favourite local snacks.

We burst out laughing when he came back with not the familiar green sweet potato balls, but something like these! We were quite sure he must have ordered the wrong thing...those deep fried balls looked similar to the Chinese deep fried sesame balls with peanut filling. He told us despite the language barrier, the stall owner told him those were 'Ondeh Ondeh'. He felt rather sheepish and the soggy ondeh ondeh made him felt even more embarrassed ;)

I assured him we would be able to get the 'real' ondeh ondeh when we get to Malacca. Indeed, he finally got his ondeh ondeh fix when we had lunch at this nyonya restaurant, Nancy's Kitchen. Those sweet, fragrant morsels more than made up for the little funny incident earlier that day.

While shopping for local delicacies at San Shu Gong (三叔公) a famous local delicacy shop in Jonker Street, I couldn't help but bought a pack of gula melaka...palm sugar or Malacca sugar. I told my son, I will try make him the 'real' ondeh ondeh, once I learn how to make them, he can have them anytime.

Well, that promise was made sometime in March...and I didn't fulfill it six months later...and I only pushed myself to make them as the gula melaka was near its 'best before' date.


Even though I didn't get down to make these sweet potato ondeh ondeh the moment we came back from our Malacca trip, I was diligent enough to bookmark recipes and instructions from books and blogs. Through my little research on this everyday local snacks, much to my surprise, I learned that ondeh ondeh, or onde onde actually means small round balls...it is a general term to refer snacks that are shaped into rounds. I have grown up equating ondeh ondeh(I was taught to pronounce it as oh-nek oh-nek!) to these green, coconut coated round balls. Actually these ondeh ondeh made with sweet potato are known as ondeh ondeh keledek (Malay word for sweet potatoes). Pardon my ignorance, it was a great discovery, at least for me!

I have little, in fact, no experience in making traditional kuihs, although growing up, I was never deprived of homemade nyonya kuihs. My mother never seems to get tired or be intimated with making traditional kuihs...be it Chinese or nyonya ones.  I have no idea what went into the making of sweet potato ondeh ondeh...I have assumed the main ingredients would be just mashed sweet potato wrapped with gula melaka? After studying the various recipes I have stumbled across, I realised that some were made without any sweet potatoes! What a surprise! But all of them would require the use of glutinous rice flour, some with the addition of tapoica flour.

I settled on this recipe which I took from this book '31 Snacks For Asian Cuisine Lovers' by Patsie Cheong. The recipe looks simple enough...actually too simple and brief for a beginner...but with the little tips and information from other recipes, I was confident enough to give it a go.

All went well, except when I tried to mix the ingredients into a dough...the amount of water used (only 28ml) is just way too little. I have to keep adding water before I could form the dough. In the end, I used up almost 100ml of liquid. I am sure there is a typo somewhere. There was no instructions on how to cook the sweet potatoes, so I chose to boil them with water. There were no instructions on how much dough to use or how much filling should go into one dough. I experienced with a few and managed to get the size which I was comfortable with...not so much on the right bite-size, but the portion which was just right for me to wrap in the filling. It was certainly not an easy task to wrap the dough...it breaks quite easily, and I was not skillful enough to wrap a loose filling. Fortunately, I managed to get the hang of it after a few over sized, giant ondeh ondeh ;)

After the daunting task of wrapping the doughs, I was all ready to boil them...but to my horrors, I noticed several doughs started to 'leak'...streaks of gula melaka was oozing out from 'hairline' cracks :( I left those leaking ones to the last, as I was quite sure they were gonna burst upon boiling. Surprisingly, even with some tiny cracks, the dough didnt burst when they were boiling in the water. The cooked doughs look as good as those without any 'leakage'. In fact, a couple of the 'good' ones started to leak while I was coating them with the grated coconut. What an experience!


I was quite proud of myself when I served these sweet potato glutinous rice balls. They were really yummy! Soft, a little chewy...and please pardon my limited vocabulary, it is a great hindrance when it comes to describing the way the sweet palm sugar ooze out while you bite into it ;) The addition of tapoica flour gives them a nice QQ (弹牙) texture.

Since I do not have a blender or food processor, I used ready made pandan paste instead of homemade blended juice from pandan leaves. I was happy that the amount of pandan paste I added was just right, at least the colour was a nice green. My elder one was all thumbs up, and the way he gobbled down the ondeh ondeh was quite an alarming sight! The younger fellow was beaming away since he was the one helping me divide the dough into small portions. The only complain he has, is to request me to made them smaller so that he can stuff it inside his mouth at one go ;)

I am glad I have finally fulfilled my promise...but there is another one to go...and another, and another...the list just goes on and on, but I will take it slowly, one at a time...


I am pleased to submit this post to this month's AB event, Aspiring Bakers #12: Traditional Kueh (October 2011) hosted by SSB of Small Small Baker. Thanks for hosting SSB!


Sweet Potato Ondeh Ondeh

Ingredients:
(makes about 36)

for dough:
300g sweet potatoes, mashed
100g glutinous rice flour
80g tapioca flour
50g sugar
about 100ml water (adjust accordingly)
1/4 teaspoon pandan paste (or green food colouring)

for filling:
150g gula melaka, grated
50g sugar

grated coconut (I used amount equivalent to half a coconut)
pinch of salt


Method:
  1. Mix freshly grated coconut (get from local wet markets) with pinch of salt. Steam over high heat for 5 mins. Leave to cool, set aside.
  2. Grate gula melaka and mix with sugar, set aside.
  3. Peel, cut sweet potatoes into cubes, boil with water until soft. While still hot, mash the sweet potatoes until very fine.
  4. Dissolve pandan paste with 100ml of water.
  5. Place mashed sweet potatoes in a mixing bowl. Add glutinous rice flour, tapioca flour and sugar. Stir with hand to mix it. Add in the pandan paste liquid a little at a time until the mixture becomes a soft dough. Add 1 or 2 teaspoons extra water if necessary. Knead the dough for a few minutes until the green colouring is evenly dissolve into the dough to yield a nice smooth dough.
  6. Divide the dough into small rounds (I used about 20g per dough). For each dough, place on your palm and flatten it to about the size of your palm. Wrap the dough with a teaspoon (I used my measuring spoon) of the gula melaka/sugar mixture. Pinch to seal. Repeat with the rest.
  7. Bring a pot of water to a full boil. Cook in batches - place ondeh ondeh into the boiling water, give a gentle stir to make sure they don't stick to the bottom of the pan. Leave to boil till they float on water, let them boil for another 2 mins. Remove and coat with grated coconut. These are best served freshly made. (Note: the dough can be wrapped, step 6, cover and leave to chill in the fridge, boil them only when ready to serve. However, I have only tried keeping uncooked dough in the fridge for not more than half a day.)
Recipe source: adapted from 31 Snacks For Asian Cuisine Lovers by Patsie Cheong

Thursday 6 October 2011

cookies on sticks

I made these M&M cookie pops to mark Children's Day, which falls on the first Friday each October.


This year, only my younger child gets to enjoy the holiday. Since my elder son has started secondary school it will be a normal school day for him. In fact, he is busy preparing for his end-of-year examination. Not sure whether I am doing the right thing, but I have left it to him to handle his studies, I no longer coach or guide him like what I used to do when he was in primary school. So, I am now feeling a little nervous as his final exam draws closer. I am keeping my fingers all crossed and could only hope that he is able to pass all his subjects.


Back to my latest bakes...I got the idea of making these cookies on sticks when I stumbled upon a Korean translated to Chinese baking book in the library. It is really a rare find! There are many Japanese translated cookbooks but this is the first time I have came across a Korean baking book. Although the recipe from the baking book is quite straight forward, I decided to fall back on my usual chocolate chip cookies recipe. The only extra step was to stick the ice cream sticks into the cookie doughs and decorate the top with some mini M&Ms before popping them into the oven.

I managed to find ice cream sticks from the neighbourhood SPK shop. It comes in small packs...50 sticks for a dollar. I had earlier went to Phoon Huat to look for the sticks, but they do not sell in small quantities, and I am too cheapskate to part $4.50 for 20 Wilton cookies sticks ;)

I washed the ice cream sticks, soak them in water for an hour before using...just to make sure they don't break or get burnt during baking. As the ice cream sticks took up space, I had to bake these cookies in two batches. I told myself I did the right thing when I retrieved these colourful lollies from the oven! In case you ask, the word 'thing' refers to picking up baking as a hobby ;)


I got my younger boy to write the words on the sticks. For those to be given away, he wrote the name of each receiver on the stick, plus his favourite smiley, before I wrapped them with clear cookie bags. They looked very much like lollipops! I didn't have photos to show as my lousy photography skill (actually I have not acquired any such skills) is not able to handle the very reflective cookie bags (^^')


There is a down side to these cookies-on-sticks though. I have to keep reminding my kids to eat them only at the dinning table, because, if you are not careful, the cookie may fall apart half way eating it :(

Despite the 'hazard', I would still think these lollies are better alternatives to any sugar laden treats for young children. Hope you won't blame me if your little ones, or not-so-little ones start pestering you  to bake some for them ;)


Here's wishing all children a Happy Children's Day!


Saturday 1 October 2011

Aspiring Bakers #11: Mid-Autumn Treats (September 2011) - Round Up

To all Aspiring Bakers, thank you for your fantastic and wonderful support for the Aspiring Bakers #11: Mid-Autumn Treats (September 2011). Special thanks to Small Small Baker, my fellow blogger pal all these years, for giving me the honour to host this blog event.

For the past 30 days, I have so much fun going through each entry. I am so inspired by the beautiful, handmade creations submitted by all the talented bakers out there. With their selfless sharing of recipes and useful tips, I hope this time next year, we aspiring bakers are able to bring our mooncake-making skills to greater heights. I believe the true spirit of such baking events is to learn and share our experiences with one another, don't you think so?

We received a total of 129 entries for the September event! I have grouped them into 5 different categories, according to the type of mooncakes. I am sure you will have a mouth watering time going through the list below :D