Monday, 10 December 2007

Banana Cake

Baked this banana cake (quickbread actually) early this morning...as it was a great way to use up a bunch of over-riped baby bananas ;)

I adapted a recipe which is meant for a banana-nut quickbread to accommodate the ingredients I have on hand. The preparation was quite straight forward, however, the cake would take about 1 hr to bake, and I had to tent (cover the top with a foil) it, about half-way during the baking time.

Instead of using a loaf pan, I baked mine using a 20cm (8") round pan. It turned out to be quite a big cake as there would be only the 3 of us at home for these few days.


When the cake was unmold, I thought it looked really ugly! After pouring the batter into the pan, I had studded the top with banana slices, trying to copy the way these beautiful banana muffins and this banana cake were made. But this decorating tip didn't work on this cake.


As I have seen how icing sugar has done wonders in spicing up an otherwise not too fantastic-looking cake/pie/tart...so, I tried dusting the top with some of it. Once again, I did more damages than any good. The cake didn't look any better :'(

My kid even told me the cake looked like a spaceship!


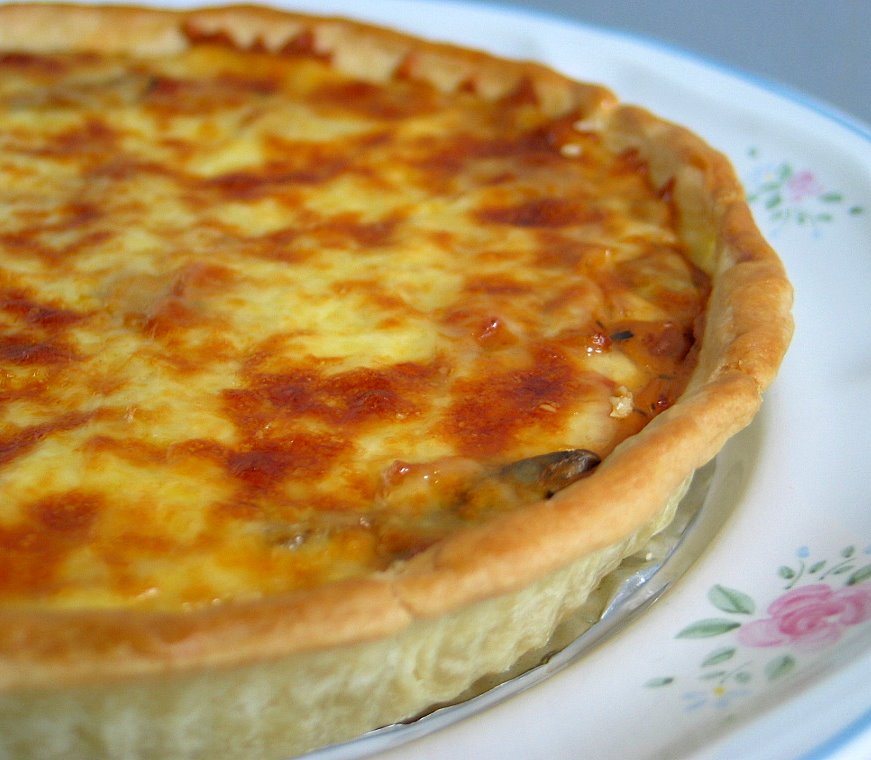
We like the slightly crisp crust though. It was baked to a nice golden brown...could it be the brown sugar used? It really reminded me of a chocolate cake if not for the banana slices on top.


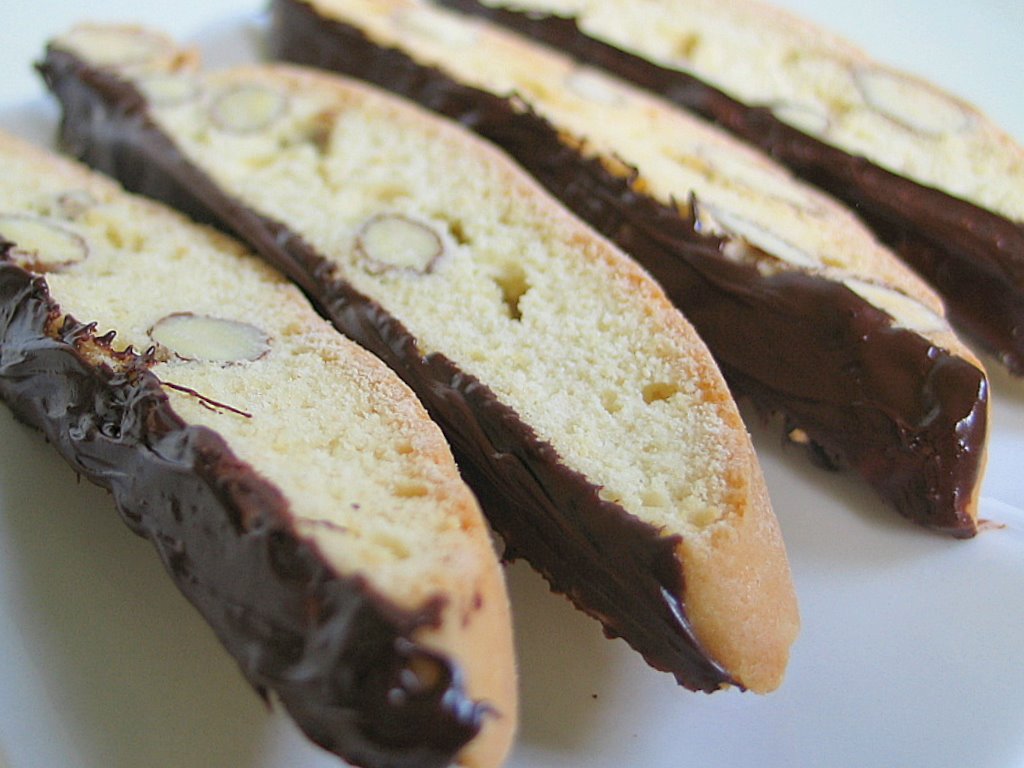
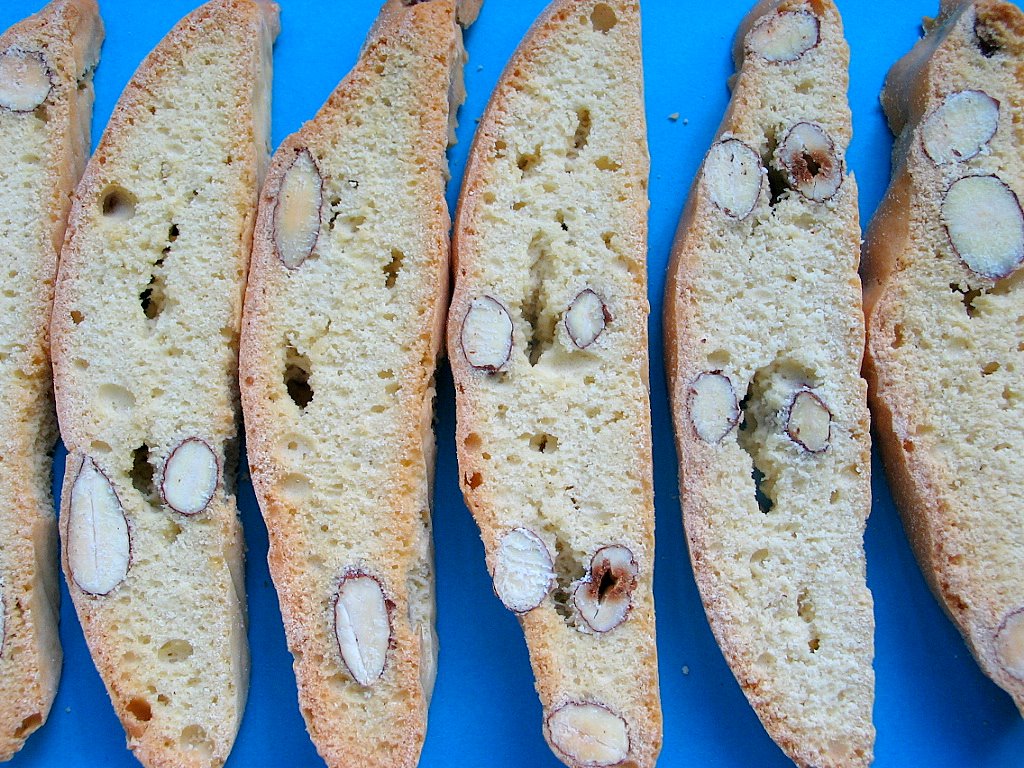
Since I prefer to taste the little chunks of bananas in the crumbs, I mashed the bananas quite coarsely. I really love the delicious taste and texture of this cake. It was very moist and the sweetness was just right. Furthermore, the addition of some wholemeal flour not only add a wholesome goodness to this cake, it also lends a nutty texture to the crumbs.

If you happen to have all the necessary ingredients on hand, this cake is really worth a try.


Ingredients:

1 1/3 cups (315g) mashed banana
1 1/2 cups (235g) plain flour
1/2 cup (75g) wholewheat (wholemeal) flour
2 teaspoons baking powder
1/2 teaspoon baking soda
1/4 teaspoon salt
2 large eggs
3/4 cup (185g) firmly packed golden brown sugar
6 tablespoons (90g) unsalted butter, melted
1/2 cup (125ml) fresh milk

Method:

  1. Position a rack in the middle of the oven. Preheat oven to 180 degC (350 degF). Line bottom of a 20cm (8") round pan with parchment paper, butter and flour the sides. Alternatively, you can use a 9 by 5 inch loaf pan, butter and flour it and set aside.
  2. In a bowl, stir together plain flour, wholemeal flour, baking powder, baking soda and salt. Set aside.
  3. In a large bowl, whisk the eggs until blended and stir in the brown sugar, butter and milk.
  4. Add the dry ingredients in 3 batches alternately with the mashed bananas, and stir with a spatula until just blended. Do not over mix.
  5. Pour batter into the prepared pan and smooth the top with the spatula. (Optional: Stud the top of the batter with slices of bananas).
  6. Bake for 55~60mins or until a toothpick inserted into the centre comes out clean. If the surface starts to brown too much, cover with a sheet of aluminum foil around the last 15mins of baking. Depending on your oven, you may have to do this mid-way during the baking time.
  7. Remove from oven, let cool in the pan for 5mins before unmold. Let cool completely on a wire rack. Store in airtight container at room temperatures for 2-3 days or freeze for up to 1 month.
Recipe source: adapted from Williams-Sonoma, Essentials of Baking

Friday, 7 December 2007

Homemade Pizza again!

For the past few days, I have been hosting sleep-overs one after another for my niece and nephew. It happened that all 4 kids were at home yesterday...and we decided to have a made-your-own Hawaiian pizza lunch.

All 4 of them love Hawaiian pizza...they only wanted ham and lots of pineapples, and nothing else on their pizzas. After comparing a few pizza dough recipe, I decided to go back to the same recipe that I tried earlier, as it seems like the recipes don't vary too far from one another. Furthermore, I knew that the recipe will yield a thicker, pan pizza crust which the kids prefer. Although I would prefer a thin crust. Only my younger boy helped me with the kneading of the dough...the rest were too engrossed with whatever games they were engaged in!


I was a little stressed when all 4 crowded around the kitchen to wait for the dough to be punched down and shaped into small dics. Then it was followed by a few minutes of chaos when 40 fingers were scrambling all over for the toppings. Each of them came up with their own way to 'mark' their personalised pizza.


This was my niece's personal pan pizza...she was clever to top hers with lots of cheese :)


and the rest...served in assorted kiddy plates.

Naturally they enjoyed their own food, and there was not a single word of complaints. I guess, even if they didn't like it, they wouldn't make a noise since they made these themselves ;) From the look of of their faces, and the way they ate their food in such hearty manners, they must have thoroughly enjoyed the meal together!


I sauteed some fresh button mushrooms with butter, added some soya sauce and pepper to taste....and with some leftover hams, I made my own mushroom pizza :D


I took note not to make the same mistake as my previous attempt, and grated the mozzarella cheese coarsely this time. I tried rolling the dough as thinly as possible, hoping to achieve a thinner crust, but the edges were still quite thick and puffy.


With the melted cheese layer on top, the pizza looked so much more appetising as compared to my 1st homemade one.


Even though I didn't use that much of cheese, it will be too fattening if I were to follow the amount stated in most pizza recipes, to my delight, I was able to achieve a small amount of the 'cheese pull' effect. Although this was really nothing compared to those pizzas that you get from pizza outlets!

This pizza was so delicious that I ate 3/4 of it all on my own...without a single feeling of guilt ;p

Wednesday, 5 December 2007

Mocha Loaf

What happens when you add some cocoa powder, instant coffee and some nutella spread to a basic bread recipe? Well, you simply get a loaf of Mocha Bread!

Here's the description of the loaf taken from the cookbook which I got the recipe:
'An irresistible cross between a loaf and a cake, the coffee and chocolate intertwined in the background, the sweetness light. It makes a kind of French-style breakfast bread, a chocolate croissant substitute, and may be eaten plain or buttered and topped with soft cream cheese.'

I am quite certain, after reading it, any bread lovers like me could hardly wait to lay their hands on these. Although I have to declare that I really couldn't taste any traces of 'mocha' in the loaf I baked ;)

As a result of not greasing my pullman tin properly, the entire loaf got stuck in the tin. I had to use a palette knife to go over the sides a few times before this stubborn loaf agreed to get out. Upon my 'rough handling', the exterior of the loaf was very badly 'bruised" ;)


Don't you think that this bread looks extremely hard and crispy, as though it just jumped off from a bread toaster?? Hmmm...don't be misled by the image you see...believe it or not, the bread was actually very soft when this photo was taken! This recipe is meant to be made using a bread machine. If you have a bread machine, you will only need to spend less than 10mins of your time to measure and put in the ingredients. In 3 hours time, you will able to enjoy this freshly baked loaf. I would love to let my machine to do the entire job, but I thought I should make a smaller loaf instead, as I do not like to keep my homemade bread for more than 2 nights. I used 2/3 the amount of the original recipe, got the machine to do the kneading (for 30mins) followed by the usual bread-making ritual: rise, roll, shape, 2nd proof and finally bake in my oven. I didn't want to use the bread machine to do the baking as I was a little wary that the bread will be overly browned due to the smaller loaf size.

Since the lighting condition was very favourable when I took these photos, I shoved my camera lens as close to the subject as possible...just to see whether it is capable of producing good 'extreme' close-ups . I guess the following few compositions were the closest my camera could manage before the images went blur!

My boy thought these doughs looked like knuckles?! You may think I am crazy, but when I saw these nicely proven doughs, my heart actually skipped a little!! Well, to me, it meant that the loaf would turn out great ;D


I noticed that if I were to slice my bread at different orientations (eg top-down vs side-way), the crumbs looked rather different! You can see the difference by comparing the above image with the one below...or was it got to do with the haphazard way I was slice it??


This slice certainly looks more like a chocolate cake than a bread?


The bread turned out to be a little bitter to my liking...likely due to the instant coffee I used. The texture was superb when freshly baked...very soft and light. However, as there is no egg or butter used in this recipe, the bread 'aged' quite fast overnight. By the next morning, it became a little heavy and dense. After toasting, it became softer and tasted great especially after I slapped on a thick layer of nutella over it! Yum!


Ingredients:

original recipe for a medium loaf:
300ml(1 & 3/8 cups) water
1 tablespoon oil
450g (3 cups) bread flour
3 tablespoons cocoa powder, sifted
2 tablespoons instant coffee granules
1 & 1/2 teaspoons salt
3 tablespoons light brown soft sugar
1 tablespoon nutella spread
2 tablespoons dried skimmed milk powder
1 & 1/2 teaspoons instant or fast-acting dried yeast

I reduced the portion for a smaller loaf:
200ml water
2 teaspoons oil
300g bread flour
2 tablespoons cocoa powder, sifted
2 teaspoons instant coffee granules
1 teaspoon salt
2 tablespoons light brown soft sugar
2 teaspoons nutella spread
2 teaspoons dried skimmed milk powder
1 teaspoon instant or fast-acting dried yeast


Method:

By bread machine:

  1. Pour the water into the breadmaker bucket. Add in oil and half the flour. Sprinkle with cocoa powder, coffee, salt and sugar.
  2. Add the nutella spread and dried milk powder. Cover with the remaining flour.
  3. With a finger, make a small indent in the centre of the flour, and place the yeast in the indent.
  4. Fit the bucket into the breadmaker, and set to either Sweet or Basic white programme. Select the desired colour of the crust.
  5. When the cycle completes, carefully shake the loaf out of the bucket and let it stand the right way up. If desired, brush with glaze. Leave the loaf to cool for at least an hour before cutting and remove the blade/paddle if necessary.

How I did it:

  1. Pour the water into the breadmaker bucket. Add in oil and half the flour. Sprinkle with cocoa powder, coffee, salt and sugar.
  2. Add the nutella spread and dried milk powder. Cover with the remaining flour.
  3. With a finger, make a small indent in the centre of the flour, and place the yeast in the indent.
  4. Fit the bucket into the breadmaker, and set to Dough function.
  5. When the Kneading completes, remove dough from the bread pan, let it rise in room temperature in a mixing bowl, covered with cling wrap. Let rise for 1~ 1hr 30mins or until the dough double in bulk.
  6. Remove dough and punch out the gas. Divide dough into 3 equal portion. Roll and shape into balls. Let rest for 10 mins. On a lightly floured surface, flatten one dough and roll out into a longish shape. Roll up the dough swiss-roll style. Do the same for the two remaining doughs.
  7. Flatten the rolled-up dough and roll out again into a long rectangular shape. Roll up tightly, and make as many rolls you can, swiss-roll style for the second time. Do the same for the two remaining doughs.
  8. Place doughs in a lightly greased bread tin/pan. Let the doughs proof for the second time, until it fills up 80% of the tin/pan, about 1hr. Cover with cling wrap.
  9. If using a pullman tin, cover the lid before baking. Bake at pre-heated oven at 180 ~ 190 deg C for 30 to 35mins.
  10. Unmould the bread immediately after removing from the oven. Let cool completely before slicing.

    Recipe source: adapted from The Complete Bread Machine Cookbook by Sonia Allison

Tuesday, 4 December 2007

Mushroom Pie


No, this is not a Quiche Lorraine, but a Mushroom Pie.


Made this pie for lunch yesterday, using a recipe from a Chinese cookbook. It was a breeze making the pie crust as the pastry was not overly soft or sticky. The only problem I had was the fillings! I didn't follow the recipe to use dairy whipping cream and milk to make the sauce as I ran out of cream. So I thought I could replace it with a ready-made pasta cream sauce which I bought recently.


To our great disappoint, the sauce didn't taste very good! Not only there was too much sodium, the taste was a bit off!


Thanks to my "temperamental" oven, the sides of the pie crust was not very browned, it was still quite pale when I unmold the pie. As a result it was not very crisp.


Here's a photo of the innards. Not very appetizing...as the sauce was not white but light brown...it was a "grilled chicken sausage" flavour. I added fresh button mushrooms and some picnic ham to the sauce. I am lucky to be blessed with 2 boys and a cute niece who are not fussy eaters. The four of us gobbled down the entire 8" pie in no time!

For those who are interested to try this out, I have posted the recipe here. I am sure if I were to make the fillings from scratch, this pie will really taste much better!


Ingredients:

pastry base:
70g butter, chilled
140g flour
15g dry grated parmesan cheese
2g salt
50~60 ml ice water

fillings:
500g assorted fresh mushrooms
25g butter
salt and pepper

sauce:
60ml milk
120g dairy whipping cream

1 egg, lightly beaten (for brushing the pie crust)

Method:

fillings:
- Stir fry assorted mushrooms with butter. Add salt and pepper to taste. Let cool.

sauce:
- Mix whipping cream with fresh milk.

pastry base:

  1. Lightly grease an 8 inch pie pan, set aside.
  2. In a mixing bowl, combine flour, cheese powder and salt, stir to mix. Rub-in the butter into the flour mixture, until the mixture resemble crumbles. Drizzle the ice water over the mixture and mix to form a soft dough. Shape dough to form a round disk and store in a plastic bag or cling wrap. Chill in the fridge for at least 30mins or up to overnight.
  3. Roll out the pastry in between 2 sheets of cling wrap or baking paper (I used two sheets of cut-out plastic bags) to about 2~3mm in thickness.
  4. Remove one side of the cling wrap or baking paper. Place it over the prepared pie pan. Mould the pastry into the pan, smoothing the edges and the rim carefully.
  5. Use a fork to poke holes on the pastry. Line the pie crust with a piece of foil or parchment paper, and fill it with dried beans, uncooked rice or metal pie weights. Bake in a preheated oven at 190 degC for 10mins. Remove the weights and continue to bake for another 10mins. Remove from oven and brush the surface with the lightly beaten egg.
  6. Drain and add in the cooked assorted mushrooms.
  7. Pour over the whipping cream/milk mixture. Top with grated cheese. Bake at preheated oven at 160 degC for 30mins until the cheese turn golden brown.

    Recipe source: adapted from 曾美子的黃金比例蛋糕

Monday, 3 December 2007

Vanilla Almond Biscotti

Last Saturday night, on impulse, I baked a batch of biscotti using Donna Hay's recipe from Modern Classics II, to give away to my friends whom I would be meeting the following day. It was my first late night baking session as it was already past 10 o'clock at night when I started working on these Italian cookies.

I was first introduced to biscotti when I visited the US several years ago. They tasted so good dipping into a hot cup of coffee! Ever since then, whenever I have the chance to visit my sister in the States, I would bring back a huge tub of chocolate-coated almond biscotti from Costco. There was once I even brought home a big cookie jar that was given free with the biscotti! The beautiful cookie jar is still sitting on my kitchen counter :)


This is my second attempt at baking biscotti. From that first attempt, and also after reading a few bloggers' baking experiences with these cookies, I got a better idea how to handle the dough this time round. I didn't make a mess even though the dough was equally wet and sticky as the one I tried on my previous attempt. In fact both recipes are quite similar, there is also no butter used in this one. (I learned that those recipes that have got butter added would yield a more manageable dough.) I didn't follow the instructions as stated in the recipe to knead the dough on a floured surface. I knew it would be a total waste of time to try to wrestle with a giant sticky, gooey mess, which looks more like a muffin batter than a cookie dough!

If you are keen to try baking your first batch of biscotti, do hop over to Cooking For Engineers to get a better idea. It is such a fantastic website, very informative and the recipes are all completed with many step-by-step illustrations.


After I got all the biscotti baked, it was already past mid-night. I only managed to coat them with melted chocolate the next morning. It was a tricky thing to work with chocolate in our weather. The chocolate set quite fast after I left them in the fridge for a short while. However, when I was trying to pack them into cookie bags, the chocolate started to melt away quickly :(


In the end, I had to wrap each biscotto with a strip of parchment paper to prevent the chocolate from smudging all over the place.

Judging from the very basic ingredients used in these biscotti, I must say they tasted quite bland if eaten plain. The taste only got better after they were dunk into a cup of coffee :) My better half likes these very much though. He would pinch one slice every time he pass by the kitchen.


Ingredients:
(makes 30~40)

2 cups (250g) plain flour
1 1/2 teaspoons baking powder
3/4 cup (150g) sugar
3/4 cup whole almonds
3 eggs
2 1/2 teaspoons vanilla extract

Method:

  1. Preheat oven to 160 degC (325 degF).
  2. Place flour, baking powder, sugar and almonds in a bowl and mix together.
  3. Add the eggs and vanilla. With a spatula, mix and fold to form a soft sticky dough. The mixture will be very sticky and wet, and resembles a batter rather than a dough.
  4. Line a baking sheet with parchment paper. Using the spatula, scoop half the amount of the dough and place it on onside of the baking sheet. Spread and shape with spatula to form a log about 10 by 3 inches in size. Spread and shape the other half of the dough into another log, space the two logs well apart.
  5. Bake for 35mins and remove from the oven. Allow to cool completely.
  6. With a sharp serrated knife, slice the logs into 1/2inch (1cm) thick slices.
  7. Place the slices on baking sheet lined with parchment paper and bake for 10~15mins or until the biscotti are crisp.
  8. Let cool and store in air-tight container.
  9. Optional: melt 100g of baking chocolate in a bowl over a pot of simmering water. Dip each biscotto into the melted chocolate and leave on a lined tray to set.